Master Hyperpigmentation: Step-by-Step Cream Application

Papaya Depigmentation Blemish Face Massage Gel
Dark spots can feel like unwelcome guests that just won't leave. Whether they're from that holiday sunburn you forgot to protect against or hormonal changes that caught you off guard, hyperpigmentation affects most of us at some point. The good news? With the right hyperpigmentation cream for face and proper application technique, you can tackle these pesky marks head-on. It's not just about slapping on any cream and hoping for the best—there's actually a proper method that can make all the difference between seeing results and wondering why nothing's working. Let's dive into the step-by-step process that'll help you get the most out of your dark spot treatment.
Hyperpigmentation is basically your skin producing too much melanin in certain spots, creating those darker patches that stand out against your natural skin tone. Think of it as your skin's way of protecting itself, but sometimes it gets a bit overzealous with the protection. The most common culprits behind facial discoloration include sun damage from UV exposure, hormonal fluctuations (hello, pregnancy and birth control), and inflammation from acne or injuries. There are three main types you'll encounter: melasma (those symmetrical brown patches often triggered by hormones), age spots (flat brown spots from sun damage), and post-inflammatory hyperpigmentation (dark marks left behind after acne or skin trauma). Each type responds differently to treatment, which is why understanding what you're dealing with matters for choosing the right approach.
Not all pigmentation correctors are created equal, and the secret lies in understanding which ingredients actually work for your specific concerns. The most effective formulations combine multiple active ingredients that work together to break down existing pigmentation whilst preventing new spots from forming. Your skin type also plays a huge role in determining what'll work best for you. Look for products that contain proven ingredients rather than getting swayed by fancy marketing claims. The best even skin tone products focus on gentle yet effective formulations that won't irritate your skin whilst delivering visible results.
This antioxidant superstar is brilliant for preventing new dark spots whilst gently fading existing ones. It works by inhibiting melanin production and protecting against environmental damage. Look for stable forms like magnesium ascorbyl phosphate in your skin brightening serum.
Derived from mushrooms, kojic acid is a gentle yet effective skin lightening cream ingredient. It blocks the enzyme responsible for melanin production, making it particularly good for sun damage repair. It's generally well-tolerated by most skin types.
This form of vitamin B3 doesn't just tackle pigmentation—it also helps with oil control and pore appearance. It's one of the gentlest options available, making it perfect for sensitive skin types seeking an uneven complexion solution.
Retinol speeds up cell turnover, helping fade dark spots faster whilst preventing new ones. It's particularly effective as an age spot reducer, though it requires careful introduction to avoid irritation. Start slow and build up tolerance gradually.

Glo Radiance Facial Oil
Proper prep work sets the stage for your treatment to actually penetrate and work effectively. Think of it like priming a wall before painting—skip this step, and your results won't be nearly as impressive. Clean skin allows your hyperpigmentation cream for face to absorb properly instead of sitting on top of dirt and oil. Start with a gentle, non-stripping cleanser that removes impurities without disrupting your skin barrier. Pat your skin dry rather than rubbing, as wet or damp skin can dilute your treatment products. If you're using chemical exfoliants like AHA or BHA, apply them on alternate nights to your pigmentation treatment to avoid over-sensitising your skin.
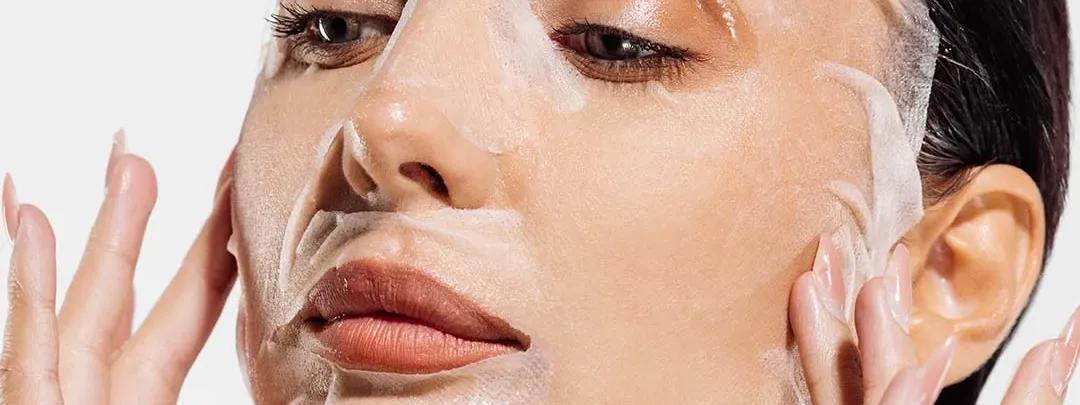
The application process can make or break your results, so let's get this right from the start. Proper technique ensures even distribution, maximum absorption, and minimal irritation. Remember, consistency beats intensity every single time when it comes to treating pigmentation. Timing matters too—most treatments work best when applied to slightly damp skin in the evening, as this is when your skin naturally repairs itself. Always start with the thinnest consistency products and work your way up to thicker formulations.
Before your first full application, test the product on a small area behind your ear or on your inner wrist. Wait 24-48 hours to check for any adverse reactions. This step is non-negotiable, especially with potent ingredients like retinol or acids.
Use lukewarm water and your regular gentle cleanser to remove all traces of makeup, sunscreen, and daily grime. Double cleanse if you've worn makeup or sunscreen during the day. Pat dry with a clean towel, leaving skin slightly damp.
If you use a hydrating or pH-balancing toner, apply it now. Skip this step if you're using actives like AHA/BHA toners, as they might interfere with your pigmentation treatment. Let it absorb completely before moving to the next step.
Apply your treatment directly to dark spots using clean fingertips or a cotton swab. For all-over application, use about a pea-sized amount for your entire face. Start with less product—you can always add more if needed.

2% Alpha Arbutin Face Serum For Hyperpigmentation
Using light, upward circular motions, gently massage the product into your skin. Don't tug or pull at delicate areas around your eyes. The goal is absorption, not aggressive rubbing that could cause irritation.
Wait 10-15 minutes before applying any additional products. This gives your treatment time to penetrate properly without being diluted or moved around by subsequent layers. Use this time to brush your teeth or prep for bed.
Apply a gentle, fragrance-free moisturiser to seal in your treatment and prevent dryness. This step is crucial for maintaining your skin barrier, especially when using active ingredients that can be drying.
Always apply broad-spectrum SPF 30 or higher during the day, regardless of weather. Many pigmentation treatments can increase photosensitivity, making sun protection absolutely essential for preventing new dark spots and protecting your progress.
Consistency is your best friend when treating pigmentation—sporadic use won't give you the results you're after. Set up a routine you can realistically stick to rather than an elaborate regimen that'll burn you out after a week. Most people see initial improvements after 6-8 weeks of consistent use, with more significant changes appearing around the 12-week mark. Patience is equally important because pigmentation didn't appear overnight, and it won't disappear that quickly either. Keep realistic expectations and focus on gradual improvement rather than dramatic overnight changes. Document your progress with photos taken in consistent lighting to track subtle improvements that might not be obvious day-to-day.
The biggest mistake? Using too much product too quickly. More doesn't equal faster results—it usually equals irritation, which can actually worsen pigmentation through inflammation. Start with small amounts and gradually increase frequency as your skin builds tolerance. Another major pitfall is mixing incompatible ingredients like retinol with AHA/BHA or vitamin C, which can neutralise effectiveness or cause irritation. Skipping sunscreen is perhaps the most counterproductive mistake of all. You could be using the most effective melasma treatment available, but without proper sun protection, you're essentially taking one step forward and two steps back. UV exposure will undo your progress and create new dark spots faster than your treatment can fade existing ones.
Taking consistent progress photos is the most reliable way to track changes, as our memory tends to be unreliable when it comes to gradual improvements. Use the same lighting, angle, and camera settings each time—natural daylight near a window works best. Take photos weekly rather than daily to avoid getting discouraged by minor fluctuations. Keep a simple skincare journal noting any changes in texture, tone, or sensitivity. Record which products you're using and any reactions. This information becomes invaluable if you need to adjust your routine or consult a dermatologist. Most people notice initial improvements in skin texture and radiance before seeing significant pigmentation fading.

Saffron Face Oil
If you've been consistent with your routine for 12-16 weeks without seeing improvement, it might be time for professional guidance. Some types of pigmentation, particularly melasma treatment cases or deep sun damage, may require prescription-strength ingredients or professional procedures like chemical peels or laser treatments. Watch out for any spots that change shape, size, or colour significantly, as these could indicate something more serious than regular hyperpigmentation. A dermatologist can also help create a comprehensive treatment plan that combines at-home care with professional treatments for stubborn cases.
Most people start seeing subtle improvements in skin texture and radiance after 4-6 weeks of consistent use. Visible fading of dark spots typically becomes apparent around 8-12 weeks, with continued improvement over 6-12 months. Deeper or older pigmentation takes longer to fade than recent spots.
Yes, but choose gentler formulations with ingredients like niacinamide or kojic acid rather than high-strength retinoids or acids. Always patch test first and introduce new products gradually. Look for fragrance-free, hypoallergenic options designed for sensitive skin types.
Avoid treatments containing retinoids, hydroquinone, or high-strength acids during pregnancy and breastfeeding. Safer options include vitamin C, azelaic acid, and kojic acid, but always consult your healthcare provider before starting any new skincare treatments during pregnancy.
Most facial hyperpigmentation treatments can be used on other areas like hands, chest, or shoulders, though body skin is typically less sensitive than facial skin. You might be able to use slightly stronger concentrations or apply more frequently than you would on your face.
Consistent daily sunscreen use is the most important preventive measure. Treat acne promptly to prevent post-inflammatory pigmentation, avoid picking at spots, and consider incorporating antioxidants like vitamin C into your routine to protect against environmental damage.
Mastering the art of hyperpigmentation cream application isn't rocket science, but it does require patience, consistency, and the right technique. Remember that treating dark spots is a marathon, not a sprint—slow and steady wins this particular race. The key lies in choosing the right ingredients for your skin type, applying them correctly, and protecting your progress with diligent sun protection. With the proper approach and realistic expectations, you can achieve the clearer, more even-toned complexion you're after. Your skin's got this, and so do you.
