How to Make Natural Soap: A Step-by-Step Guide

How to Make Natural Soap: A Step-by-Step Guide
Published Date - 29 July 2025
Soap has been a skincare essential for thousands of years, transforming from simple mixtures of animal fats and ashes to the sophisticated cleansers we know today. But here's the thing—whilst commercial options flood the market, there's something rather magical about crafting your own natural soap at home. Not only do you control every single ingredient that touches your skin, but you also create a moisturising cleanser that's perfectly tailored to your needs. Whether you're dealing with sensitive skin or just fancy trying something new, making handmade soap might just become your new favourite weekend project.

Understanding Natural Soap Basics

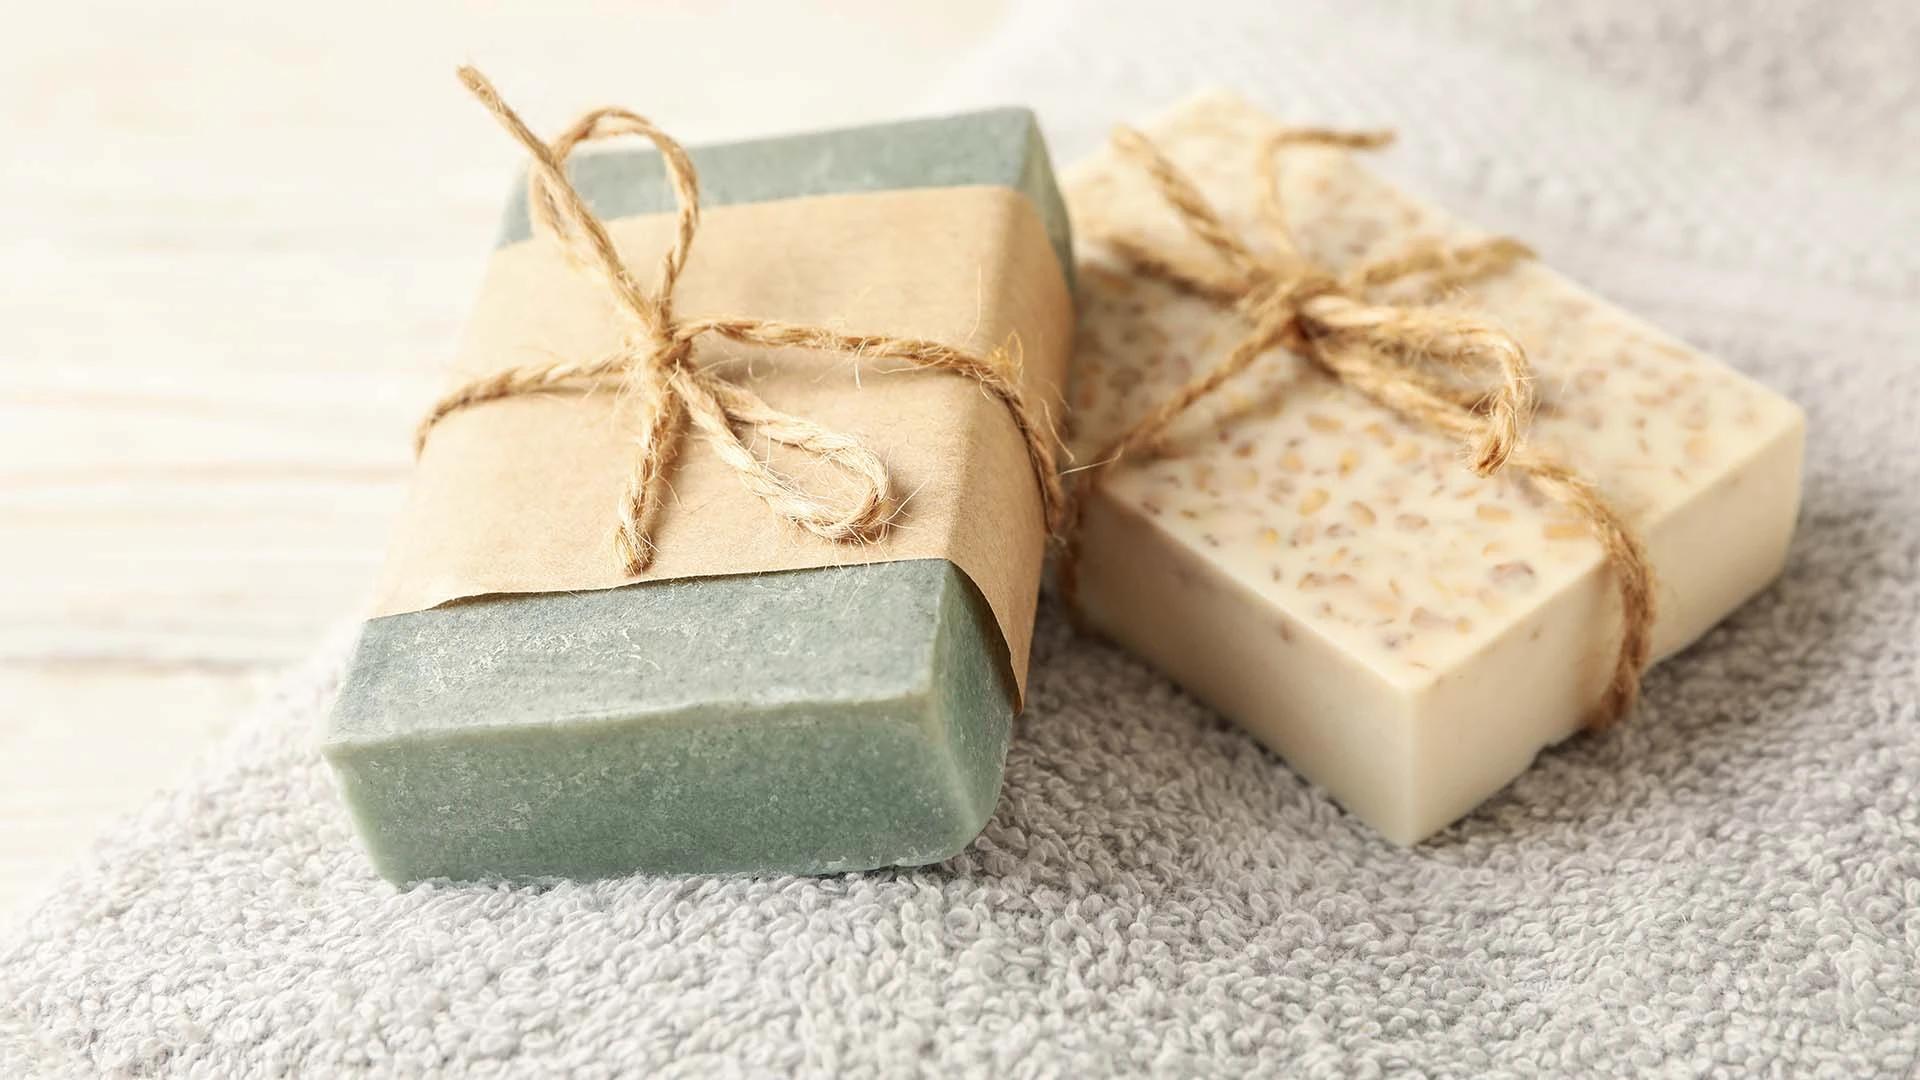
Natural soap offers numerous benefits for skincare enthusiasts who want gentle cleansing without harsh chemicals. Before diving into the soap-making process, it's essential to understand what sets natural soap apart from commercial alternatives. The key difference lies in the ingredients and the process—natural soap retains its glycerin content, which commercial manufacturers often remove and sell separately.

What is Natural Soap?

Natural soap is created through a chemical reaction called saponification, where oils and lye combine to form soap and glycerin. Unlike mass-produced bars, natural soap contains organic ingredients like plant-based oils, essential oils, and botanical extracts. These ingredients work together to create a pH balanced cleanser that's gentler on your skin than synthetic alternatives.

Benefits of Natural Soap for Skin Health

Handmade soap delivers moisture whilst cleansing, thanks to its retained glycerin content. This makes it particularly brilliant for sensitive skin types who struggle with conventional cleansers. Natural ingredients like coconut oil provide gentle cleansing properties, whilst shea butter adds nourishing benefits that leave your skin feeling soft rather than tight.

Essential Ingredients for Natural Soap Making

Creating your own natural soap requires a careful selection of ingredients that work harmoniously together. Let's explore the key components you'll need for your homemade soap adventure. The beauty of DIY soap making lies in choosing organic ingredients that suit your specific skin needs, whether you're after an exfoliating bar or a gentle moisturising cleanser.

Base Oils and Butter

Your choice of base oils determines your soap's cleansing and moisturising properties. Coconut oil creates a rich lather and provides cleansing power, whilst olive oil adds conditioning benefits. Shea butter or cocoa butter contribute to a creamy texture that's particularly lovely for sensitive skin formulations.

Lye: The Crucial Component

Sodium hydroxide (lye) is absolutely essential for saponification—without it, you simply can't make soap. Don't worry though, when properly measured and mixed, lye transforms completely during the soap-making process. Always use food-grade lye and handle it with proper safety precautions.

Essential Oils for Fragrance and Benefits

Essential oils do double duty in natural soap—they provide gorgeous scents whilst offering therapeutic benefits. Lavender essential oil promotes relaxation, whilst tea tree oil has cleansing properties. For facial cleansing bars, consider gentler options like chamomile or rose geranium.

Natural Colorants and Additives

Natural colorants like spirulina powder, turmeric, or beetroot powder create beautiful hues without synthetic dyes. For texture variations, consider adding oatmeal for gentle exfoliation or honey for extra moisturising properties.

Equipment and Safety Precautions

Proper equipment and safety measures are crucial when making natural soap at home. This section covers everything you need to get started safely and successfully. Remember, soap making involves working with lye, which requires respect and proper handling to ensure your safety throughout the process.

Essential Tools for Soap Making

You'll need stainless steel or heat-resistant plastic containers for mixing, a digital scale for precise measurements, and an immersion blender for combining ingredients. Silicone moulds work brilliantly for shaping your bars, whilst wooden spoons help with stirring. A thermometer ensures your ingredients reach the right temperature for successful saponification.

Safety Gear and Precautions

Always wear protective eyewear and rubber gloves when handling lye. Work in a well-ventilated area and keep vinegar nearby to neutralise any spills. Never use aluminium containers, as lye will react with the metal. Keep pets and children away from your workspace during the soap-making process.

Step-by-Step Guide to Making Natural Soap

Now that we've covered the basics, let's dive into the actual soap-making process. Follow these steps carefully to create your own natural, moisturising cleanser that's perfect for your skin type. The cold process method we're using here allows you to maintain control over every ingredient whilst creating a gentle cleansing bar.

Preparing Your Workspace

Set up your workspace with all equipment within easy reach. Cover surfaces with newspaper or plastic sheeting for easy cleanup. Ensure adequate ventilation and double-check that you have all safety gear ready. Mix your lye solution in a well-ventilated area, ideally outdoors or near an open window.

Measuring and Mixing Lye Solution

Weigh your lye and water separately using a digital scale—accuracy is crucial here. Always add lye to water, never the reverse, to prevent dangerous reactions. Stir gently until dissolved, then set aside to cool. The mixture will heat up significantly, so allow it to cool to around 38-43°C before proceeding.

Blending Oils and Butters

Melt your solid oils and butters gently, then combine with liquid oils in your mixing container. Allow the oil mixture to cool to a similar temperature as your lye solution. Both mixtures should be within 10°C of each other for optimal results.

Combining Lye Solution with Oil Mixture

Slowly pour the lye solution into your oil mixture whilst stirring continuously. Use an immersion blender to mix until you reach 'trace'—the point where the mixture thickens enough that drizzled soap mixture leaves a visible trail on the surface.

Adding Essential Oils and Additives

Once you've reached light trace, quickly stir in your essential oils and any natural additives like oatmeal or honey. Work swiftly, as the mixture will continue to thicken. For exfoliating bars, add ground oats or poppy seeds at this stage.

Moulding and Curing Your Soap

Pour your soap mixture into prepared moulds and tap gently to release air bubbles. Cover with plastic wrap and insulate with towels. After 24-48 hours, unmould your soap and cut into bars. Cure for 4-6 weeks in a well-ventilated area, turning occasionally.

Customising Your Natural Soap

One of the joys of making your own soap is the ability to customise it perfectly for your needs. Here are some ways to make your natural soap uniquely yours, whether you're creating bars for facial cleansing or body care. The possibilities are endless when you understand how different ingredients affect the final product.

Creating Exfoliating Bars

For gentle exfoliation, add finely ground oats, poppy seeds, or coffee grounds to your soap mixture. These natural exfoliants help remove dead skin cells whilst remaining gentle enough for regular use. Coffee grounds work particularly well in morning shower bars, whilst oats are perfect for sensitive skin.

Formulating for Sensitive Skin

Sensitive skin benefits from simple, gentle formulations with minimal ingredients. Choose nourishing base oils like sweet almond or jojoba, and avoid strong essential oils. Colloidal oatmeal and chamomile create soothing properties that calm irritated skin whilst maintaining effective cleansing.

Balancing pH for Gentle Cleansing

Natural soap typically has a pH between 9-10, which is higher than skin's natural pH but still gentle when properly formulated. Using a higher percentage of conditioning oils helps create a milder bar. You can also superfat your recipe by using slightly more oils than needed for complete saponification.

Troubleshooting Common Soap Making Issues

Even experienced soap makers encounter issues from time to time, so don't worry if your first batch isn't perfect. Learn how to identify and solve common problems in the soap-making process. Most issues can be prevented with careful measuring and proper technique, but knowing how to fix problems helps you become a more confident soap maker.

Dealing with Separation

If your soap mixture separates during mixing, it usually means the temperatures were too different or you didn't reach proper trace. Try mixing with your immersion blender again, or gently reheat both mixtures to similar temperatures and re-blend carefully.

Fixing Lye Heavy Soap

Lye-heavy soap feels harsh and may cause skin irritation. This happens when measurements are incorrect or ingredients aren't properly mixed. Unfortunately, lye-heavy soap can't be safely used and should be discarded. Always double-check your recipe calculations and measurements.

Addressing Texture Problems

Grainy texture often results from undissolved lye or additives that weren't properly incorporated. Ensure your lye solution is completely clear before use, and mix additives thoroughly at trace. Soft soap that won't harden usually needs more time to cure or indicates too much liquid in the recipe.

Storing and Using Your Homemade Natural Soap

Proper storage and usage of your natural soap can extend its life and maximise its benefits for your skincare routine. Here's what you need to know about caring for your handmade creations. Unlike commercial soap, natural soap requires slightly different handling to maintain its quality and effectiveness over time.

Best Practices for Soap Storage

Store cured soap in a cool, dry place with good air circulation. Wrap individual bars in breathable materials like paper or fabric rather than plastic, which can trap moisture. Properly stored natural soap can last 12-18 months, though it's best used within the first year for optimal benefits.

Tips for Using Natural Soap Effectively

Use a soap dish with drainage to keep your bar dry between uses—this prevents it from becoming mushy and extends its life. For facial cleansing, create a rich lather in your hands first, then apply to damp skin. Natural soap works beautifully as a moisturising cleanser for both face and body when used properly.

Frequently Asked Questions

Is natural soap better for sensitive skin?

Yes, natural soap is often gentler on sensitive skin because it retains glycerin and doesn't contain harsh synthetic detergents. The organic ingredients and pH balanced formulation make it a brilliant choice for those who struggle with commercial cleansers. However, patch test any new soap before full use.

How long does homemade natural soap last?

Properly made and stored natural soap typically lasts 12-18 months. The high oil content means it can eventually go rancid, so use within the first year for best results. Signs of rancidity include an unpleasant smell or orange spots on the soap.

Can I use natural soap for facial cleansing?

Absolutely! Many natural soaps work brilliantly for facial cleansing, especially those formulated with gentle oils and without harsh additives. Choose bars with nourishing ingredients like olive oil or shea butter, and avoid heavily fragranced varieties for face use.

What's the difference between hot and cold process soap making?

Cold process soap (what we've covered here) uses the heat generated by saponification itself, whilst hot process involves external heat to speed the reaction. Cold process creates smoother bars with better conditioning properties, whilst hot process soap can be used immediately after cooling.

Final Thoughts

Making natural soap at home opens up a world of possibilities for your skincare routine. You control every ingredient, create moisturising cleansers tailored to your needs, and develop a rewarding hobby that produces practical results. Whether you're crafting exfoliating bars for morning routines or gentle cleansers for sensitive skin, the process connects you with an ancient tradition whilst meeting modern skincare needs. Start with simple recipes, focus on safety, and don't be afraid to experiment as you gain confidence. Your skin will thank you for the switch to handmade, natural soap that's as unique as you are.
Sangria Experience Logo
Document