Master Winged Eyeliner: A Beginner's Step Guide

Wing It Eyeliner
Let's be real—winged eyeliner can feel like trying to draw the Mona Lisa with your non-dominant hand whilst blindfolded. One eye looks like a perfect cat eye, the other resembles something your nephew might draw. But here's the thing: mastering this winged eyeliner tutorial isn't about being born with steady hands or having years of makeup artistry under your belt. It's about knowing the right techniques, having the proper tools, and practising a few foolproof methods that actually work. Whether you're after a subtle flick for work or a dramatic wing for date night, this guide breaks down everything you need to know about creating perfect winged eyeliner that'll have you feeling like the main character in your own story.
Winged eyeliner isn't just another makeup trend that'll disappear faster than your favourite lipstick shade. This classic cat eye makeup look has been turning heads since the 1950s, and there's a proper reason why it's stuck around. The magic lies in how it instantly lifts and elongates your eyes, creating that sultry, confident vibe that works whether you're heading to a board meeting or a night out with mates. The beauty of learning how to do winged eyeliner is its versatility. You can keep it minimal with a tiny flick that just kisses the outer corner, or go full drama with a wing that could practically take flight. It's like having a secret weapon in your makeup bag—one that transforms your entire look with just a few strategic strokes.
Classic cat eye creates that timeless, elegant look that never goes out of style. Graphic wings offer bold, artistic statements perfect for creative expression. Subtle flicks provide everyday sophistication without overwhelming your features. Double wings add modern edge for those ready to experiment with different eyeliner styles.
Before diving into any eyeliner tutorial, let's sort out what you'll actually need. The right tools can make the difference between a flawless wing and a wonky disaster that has you reaching for makeup wipes.
Liquid eyeliner gives you the sharpest, most precise lines but requires a steadier hand. It's brilliant for creating dramatic eyeliner looks that photograph beautifully and last all day. However, it's less forgiving if you make mistakes. Pencil eyeliner offers more control and is perfect for winged eyeliner for beginners. You can build up the intensity gradually, and it's much easier to correct if things go sideways. The downside? It might not give you that razor-sharp edge liquid provides. Gel eyeliner sits somewhere in the middle—more precise than pencil but more forgiving than liquid. It's particularly good for creating smoky, blended effects.
Cotton buds become your best friend for cleanup and precision work. Concealer helps create those Instagram-worthy sharp edges. A flat brush can help blend and soften harsh lines. Tape or a business card works as a guide for perfectly straight wings.
Right, let's get into the actual makeup tutorial eyeliner bit. This method breaks down the process into manageable chunks, so you're not trying to create a masterpiece in one go.

Brushtip Eyeliner
Start with clean, dry eyelids. Any leftover moisturiser or oil will make your eyeliner slip and slide like it's on a water park ride. If you're planning to wear eyeshadow, apply that first—it's much easier to fix eyeliner over eyeshadow than the other way around. Consider using an eyeshadow primer if you want your wing to stay put through a long day or sweaty commute. It creates a grippy base that helps your eyeliner adhere better and last longer.
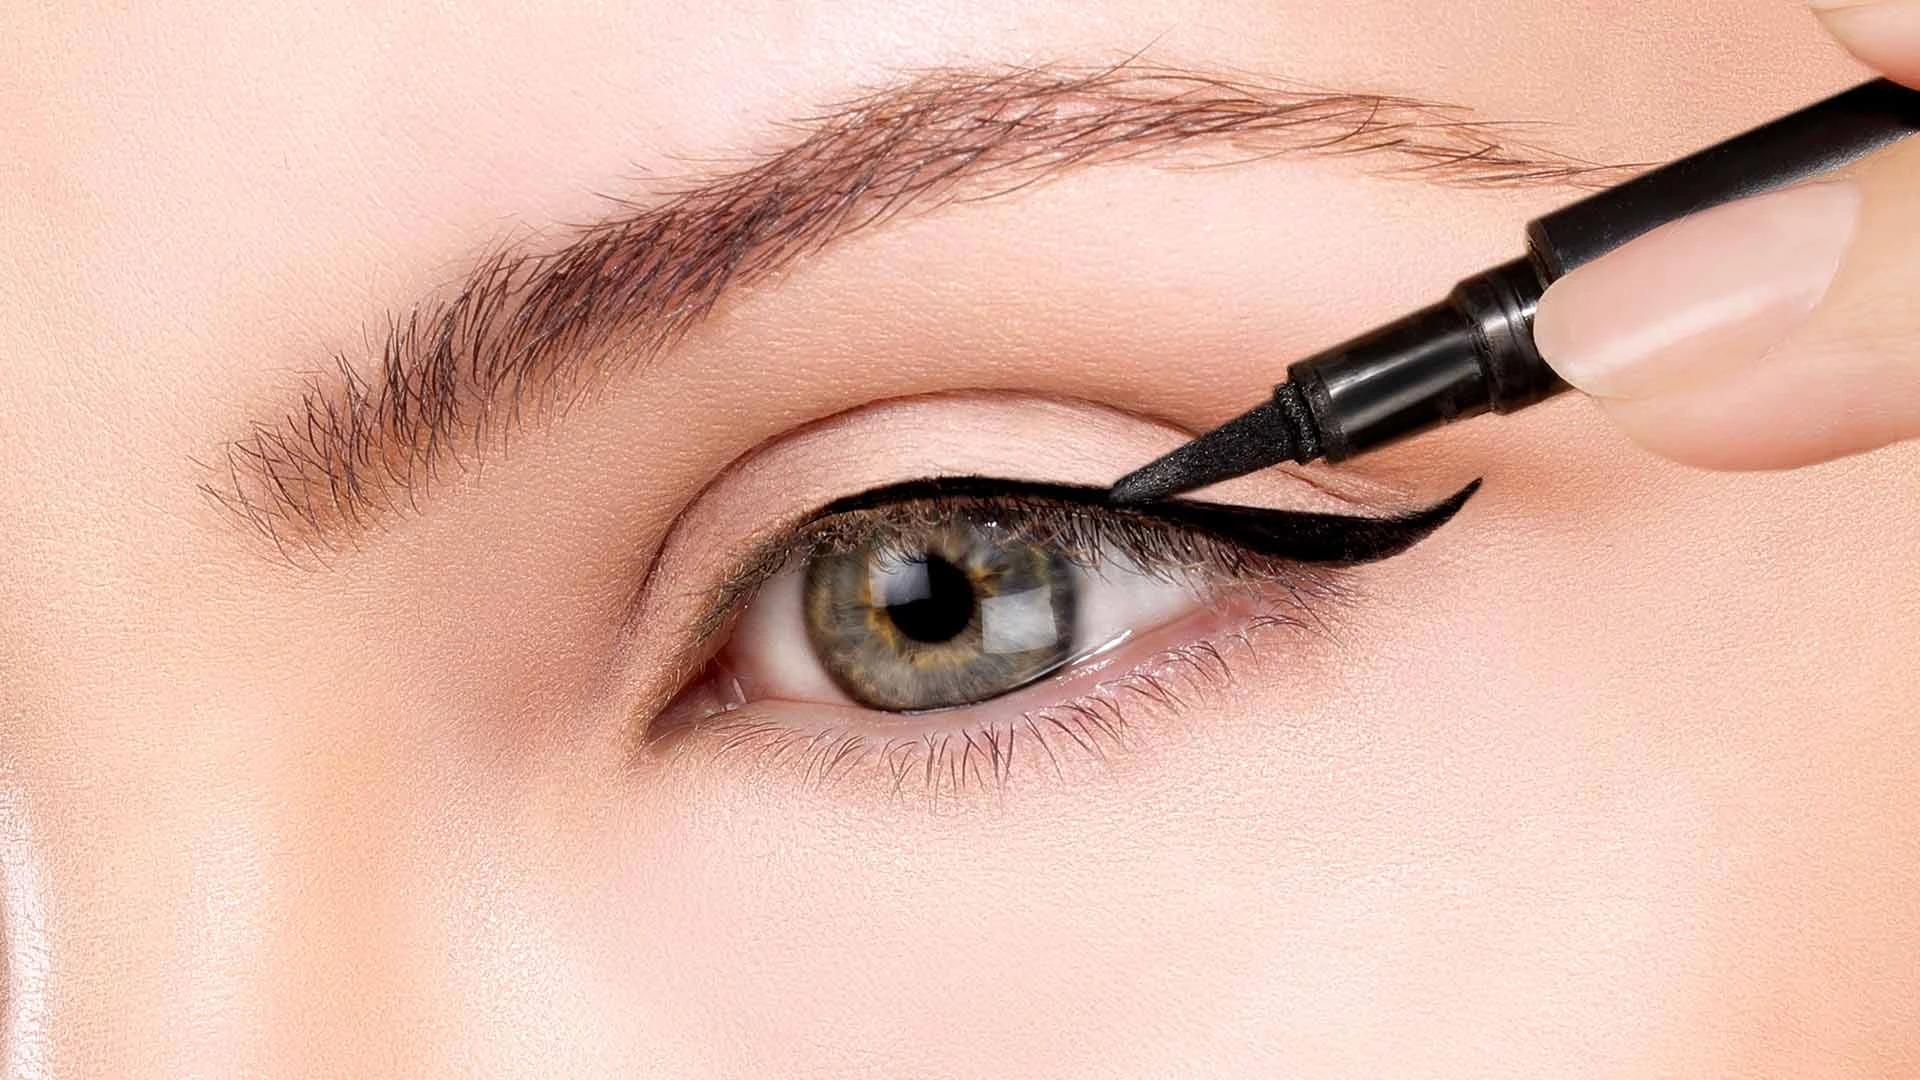
This is where most people go wrong—they just start drawing without planning. Instead, use the mapping technique that makeup artists swear by. Hold a brush or pencil against your nostril and angle it past the outer corner of your eye towards the end of your eyebrow. That's your wing direction. Alternatively, follow your lower lash line upwards—imagine extending that line, and you'll find your natural wing angle. This eyeliner technique ensures your wing complements your eye shape rather than fighting against it.
Start by drawing a small diagonal line from the outer corner of your eye following your mapped angle. Keep it short initially—you can always extend it later. Then, draw a line from the tip of this diagonal back down to your upper lash line, creating a triangle shape. This is your easy winged eyeliner foundation. Don't worry about filling it in yet; focus on getting the shape right first. If one eye looks wonky, use a cotton bud with a tiny bit of makeup remover to adjust.
Now fill in your triangle and trace along your upper lash line, connecting everything smoothly. Work in small strokes rather than trying to create one perfect line—it's much more forgiving and gives you better control. Check both eyes frequently and adjust as needed. Remember, they're sisters, not twins—perfect symmetry isn't always necessary, but they should look balanced.
Use a flat brush with a tiny amount of concealer to sharpen the bottom edge of your wing. This creates that crisp, professional finish that makes all the difference. Set everything with a light dusting of translucent powder to prevent smudging. With platforms like Smytten offering trial-sized eyeliners from trusted brands, you can experiment with different formulas and find your perfect match without committing to full-size products. This makes learning these techniques much more affordable and fun.
Not all eyes are created equal, and your winged eyeliner for beginners approach should reflect that. Understanding your eye shape helps you customise the basic technique for the most flattering results.
If you have hooded eyes, the standard wing technique might disappear when your eyes are open. Instead, draw your wing with your eyes open, looking straight into the mirror. This ensures the wing is visible and doesn't get lost in the fold. Keep the wing slightly higher and shorter than you might for other eye shapes. Focus on extending outward rather than upward to avoid the wing disappearing entirely.

Finish Eyeliner
For downturned eyes, angle your wing slightly higher than the standard technique suggests. This creates a lifting effect that counteracts the natural downward slope. Start your wing from slightly above the outer corner rather than directly from it. Avoid extending the wing too far down, as this can emphasise the downturned shape rather than correcting it.
Round eyes benefit from wings that extend outward rather than upward, creating an elongating effect. Keep the wing relatively straight rather than dramatically angled, and consider extending it slightly further than you might for other eye shapes. You can also start your eyeliner slightly in from the inner corner to create the illusion of length.
Even with the best intentions and steady hands, things can go sideways. Here's how to fix the most common winged eyeliner disasters without starting from scratch.
If one wing is higher or longer than the other, don't panic and don't start over. Use a cotton bud with makeup remover to gently adjust the wonky wing, or add a bit more to the smaller wing to match. For future applications, always do both wing outlines before filling anything in. This lets you compare and adjust before you're committed to the shape.
Smudgy wings usually happen because of oily lids, touching your eyes, or using a formula that's not quite right for you. Switch to a waterproof formula if you're prone to smudging, and always set your eyeliner with powder. If you naturally have oily lids, that eyeshadow primer becomes non-negotiable. It creates a barrier between your skin's oils and your eyeliner.
If your wing looks too dramatic or too subtle, remember that eyeliner is buildable. Start smaller than you think you want and gradually increase the size. It's much easier to add more than to take away. Consider your overall makeup look too—a bold wing might overwhelm a natural face, whilst a tiny flick might get lost with dramatic eyeshadow.
Once you've mastered the basic technique, there's a whole world of creative possibilities waiting. These advanced eyeliner techniques let you experiment and find your signature style.

Wing in a Wink Eye liner with stamp Monocarton
Double wings create a modern, editorial look that's surprisingly wearable. Simply add a second, smaller wing above your main one, following the same angle. Coloured wings offer a fun way to incorporate trends without committing to bold eyeshadow. Try navy for a subtle twist on black, or experiment with metallics for special occasions. Floating wings—where the wing doesn't connect to your lash line—create an artistic, avant-garde effect that's perfect for creative expression.
Your winged eyeliner should complement, not compete with, the rest of your makeup. Pair subtle wings with bold lips, or go dramatic with your eyes and keep everything else minimal. Consider the occasion too—a sharp, precise wing works brilliantly for professional settings, whilst a slightly smudged, smokier version suits casual weekend vibes. Through trial and practice, you'll discover which techniques and products work best for your unique features and lifestyle. Smytten's extensive range of eyeliner options from brands like Renee and other trusted names means you can explore different formulas and find your perfect match without the commitment of full-size purchases.
Most people see significant improvement within a few weeks of regular practice. The key is consistency—even five minutes of practice every few days will build your muscle memory and confidence faster than occasional marathon sessions.
Always apply eyeshadow first, then eyeliner. This prevents you from accidentally smudging your perfect wing whilst blending eyeshadow, and it's much easier to clean up eyeliner mistakes over eyeshadow than vice versa.
Absolutely! You might need to adjust the wing size and angle slightly to ensure it's visible behind your frames. Consider making the wing slightly thicker and more dramatic to compensate for how glasses can minimise eye makeup.
Use a gentle, oil-based makeup remover and avoid rubbing harshly. Soak a cotton pad with remover, hold it against your closed eye for a few seconds to dissolve the product, then gently wipe away. This prevents tugging at the delicate eye area.
If your wing looks too stark, try softening the edges with a small, fluffy brush. You can also smoke out the wing slightly with a matching eyeshadow colour, or use a brown eyeliner instead of black for a softer effect.
Mastering winged eyeliner isn't about achieving perfection on your first try—it's about understanding the techniques that work for your unique features and building confidence through practice. Remember, even makeup artists had to start somewhere, and those flawless wings you see on social media often take multiple attempts and strategic editing. The beauty of learning these eyeliner techniques lies not just in the final result, but in the process of discovering what works for you. Some days you'll nail it in one go, other days you'll need a few attempts—and that's completely normal. With Smytten's curated selection of trial-sized eyeliners from over 1,500 trusted brands, you can experiment with different formulas and find your perfect match without the pressure of committing to full-size products. Whether you prefer the precision of liquid, the forgiveness of pencil, or the versatility of gel, there's an option waiting to be discovered. After all, why settle for 'maybe' when you can try it all and find the eyeliner that makes creating your perfect wing feel effortless?
