How to Create Stunning Eye Makeup Looks

How to Create Stunning Eye Makeup Looks
Published Date - 29 July 2025
Powder Brush Eyeshadow Brush1 Unit

Swiss Beauty

Powder Brush Eyeshadow Brush

14925 % OFF
112
Your eyes are absolutely the star of any makeup look, and honestly, they deserve all the attention. Whether you're going for that effortless, no-makeup makeup vibe or channelling full-on glam energy, mastering eye makeup opens up a world of possibilities. From quick daytime touches to bold, statement looks that stop scrolls, the right techniques can totally transform your entire face. Ready to discover what works for your unique style and make every blink count?

Essential Eye Makeup Products

Building your eye makeup collection doesn't have to be overwhelming – it's all about finding your kind of essentials that actually work for you. The right products make all the difference between a look that lasts and one that disappoints halfway through your day. Let's break down what you really need in your makeup bag.

Choosing the Right Eyeshadow Palette

Your eyeshadow palette is basically your creative playground. Look for one with a good mix of neutrals and a few fun shades to experiment with. Matte shades are perfect for blending and creating depth, while shimmers add that extra sparkle when you want to stand out.

Eyeliner Options for Various Looks

Eyeliners come in different formulas – pencil, gel, liquid – and each serves its purpose. Pencil liners are brilliant for beginners and smudging, whilst liquid liners give you that crisp, sharp line for winged eyeliner looks. Gel liners sit somewhere in between, offering control and intensity.

Mascara Selection for Different Lash Effects

Mascara application can make or break your eye look. Choose lengthening formulas for a natural finish or volumising ones when you want drama. Waterproof versions are your go-to for long days or emotional moments, but they're trickier to remove.

The Importance of Eye Primer

Eye primer might seem like an extra step, but it's actually a total game-changer. It keeps your eyeshadow looking fresh all day and makes colours pop more vibrantly. Think of it as the foundation for your eye makeup – it creates the perfect base for everything else.

Basic Eye Makeup Techniques

Mastering the basics is like learning to walk before you run – these fundamental skills will serve you well no matter what look you're going for. Once you've got these down, you'll feel so much more confident experimenting with different styles. Practice makes perfect, but don't stress about getting it right immediately.

Proper Eyeshadow Application

Start with lighter shades on your lid and gradually build up darker colours in the outer corner and crease. Use a fluffy brush for blending and pack colour onto the lid with a flat brush. Always blend upwards and outwards for the most flattering effect.

Eyeliner Techniques for Beginners

Begin with small dots or dashes along your lash line, then connect them for a smoother application. Rest your elbow on a table for steadier hands, and don't worry if it's not perfect – you can always clean up with a cotton bud and some makeup remover.

Mascara Application Tips for Fuller Lashes

Wiggle the wand at the base of your lashes, then sweep upwards. Apply multiple thin coats rather than one thick layer to avoid clumping. Don't forget your bottom lashes – they help tie the whole look together.

Creating a Natural Eye Look

The natural eye look is honestly perfect for everyday wear – it's polished without being obvious, and works brilliantly whether you're heading to work or meeting friends for brunch. This look is all about enhancing what you've already got rather than creating drama. It's also a fantastic starting point if you're new to eye makeup.
Powder Brush Eyeshadow Applicator Brush1 Unit

Swiss Beauty

Powder Brush Eyeshadow Applicator Brush

17925 % OFF
134

Selecting Neutral Shades

Stick to browns, taupes, and soft pinks that complement your skin tone. These shades create depth without looking heavy or overdone. A good rule is to choose colours that are only slightly darker than your natural skin tone.

Blending Techniques for a Seamless Finish

Blending is absolutely crucial for a natural look. Use circular motions with a fluffy brush to soften any harsh lines. Build up colour gradually – you can always add more, but it's harder to take away. The goal is to create a subtle gradient that looks effortless.

Enhancing Lashes Without Overdoing It

For natural looks, focus on separating and lengthening rather than adding volume. One coat of brown or black mascara usually does the trick. Curl your lashes first if you want a bit more lift, but keep it subtle.

Mastering the Smokey Eye

The smokey eye is that classic look that never gets old – it's sultry, sophisticated, and surprisingly versatile. While it might look complicated, following a smokey eye tutorial step by step makes it totally achievable. The key is building up the intensity gradually and blending like your life depends on it. This look works for evening events, date nights, or any time you want to feel a bit more glamorous.

Choosing the Right Colors for Your Skin Tone

Classic black and grey work on everyone, but don't be afraid to experiment. Bronze and copper tones look stunning on warmer skin, whilst cool-toned greys and purples complement cooler undertones. Navy blue creates a sophisticated alternative to traditional black.

Step-by-Step Smokey Eye Tutorial

Start by applying a medium shade across your entire lid. Deepen the outer corner and crease with a darker colour, blending outwards. Add the darkest shade close to the lash line and blend upwards. Highlight the inner corner and brow bone to add dimension and make your eyes pop.

Common Mistakes to Avoid

Don't go too dark too quickly – build up the intensity slowly. Avoid harsh lines by blending continuously as you work. Make sure to balance both eyes by stepping back frequently to check your progress. And remember, smokey eyes look best with defined lashes, so don't skip the mascara.

Perfecting the Winged Eyeliner

Winged eyeliner can honestly transform your entire look in seconds – it's sharp, chic, and gives you that instant confidence boost. The trick is finding the right wing shape for your eye type and getting comfortable with the technique. Don't expect perfection on your first try; even makeup artists had to practice this one.

Different Wing Styles for Various Eye Shapes

Hooded eyes benefit from thinner wings that don't disappear when eyes are open. Round eyes look great with dramatic, elongated wings. For almond eyes, you can pretty much try any wing style. Downturned eyes should angle wings slightly upwards to create a lifting effect.

Tools and Products for Precise Application

Liquid eyeliners with felt tips offer the most control for beginners. Some people swear by tape or business cards as guides for creating straight lines. Good lighting and a steady surface are absolutely essential – don't attempt winged liner in dim lighting.

Troubleshooting Common Winged Liner Issues

Makeup Large Eyeshadow Brush R71 pc

RENEE

Makeup Large Eyeshadow Brush R7

499
If your wings are uneven, use a cotton bud with makeup remover to clean up and reshape. Shaky hands? Try connecting small dots instead of drawing one continuous line. If the wing looks too thick, you can always make it thinner with concealer on a small brush.

Exploring Colorful Eye Makeup

Colorful eye makeup is where you can really let your personality shine through – it's playful, creative, and perfect for when you want to make a statement. Whether you're trying electric blues, vibrant purples, or sunset oranges, colour can completely change your look. Start small if you're nervous, maybe just a pop of colour on the lower lash line or inner corner.

Colour Theory Basics for Eye Makeup

Complementary colours (opposites on the colour wheel) make each other pop – think purple and yellow, or blue and orange. Analogous colours (next to each other) create harmonious, blended looks. Your eye colour also matters: warm tones like golds and coppers make blue eyes pop, whilst cool purples and silvers complement brown eyes.

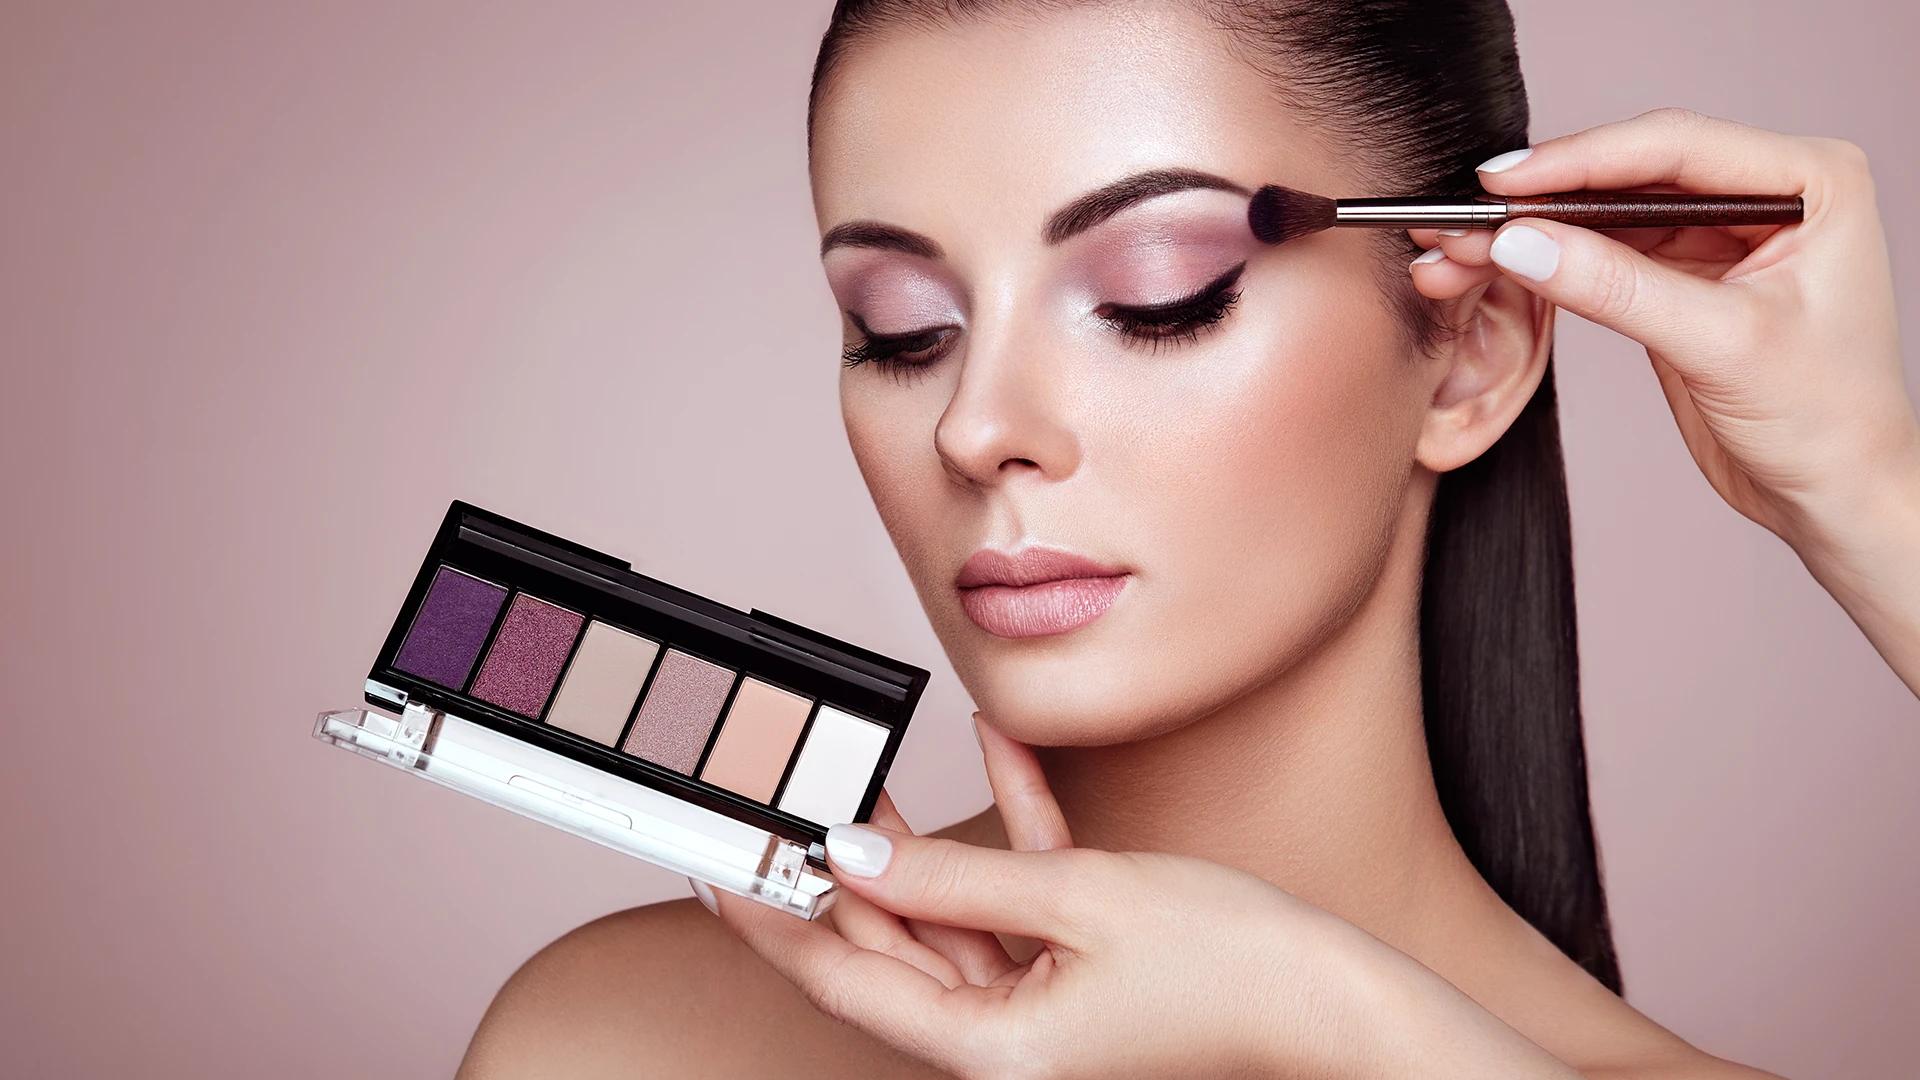
Techniques for Blending Multiple Colours

Use separate brushes for each colour to avoid muddying. Apply the lightest shade first, then gradually add deeper colours. Blend where colours meet to create smooth transitions. Pack colour onto the lid first, then blend the edges – this keeps the intensity whilst softening harsh lines.

Balancing Colorful Eyes with the Rest of Your Makeup

When your eyes are the star, keep the rest of your makeup relatively simple. Opt for neutral lips and a fresh, glowing complexion. If you're wearing bold eyeshadow, skip heavy contouring – let your eyes do all the talking.

Advanced Techniques: The Cut Crease

The cut crease is definitely a step up from basic eyeshadow techniques, but it creates such a striking, editorial look that's totally worth the effort. This technique literally 'cuts' through your natural crease to create a sharp, defined line. Following a proper cut crease tutorial makes this advanced look much more manageable, even for intermediate makeup users.

What is a Cut Crease?

A cut crease involves applying a light, contrasting colour or concealer over your natural crease line, creating a sharp division between your lid and brow bone area. This technique makes your eyes appear larger and more defined, with a very polished, professional finish.

Step-by-Step Cut Crease Tutorial

First, apply your transition shade above the crease. Next, use concealer or a light eyeshadow to cut through the crease area, creating a sharp line. Pat your chosen lid colour over the concealer, being careful not to blend into the crease. Finally, define the cut line with a darker shade if desired.

Variations of the Cut Crease Look

You can create soft cut creases for a more wearable look, or go full editorial with sharp, dramatic lines. Halo cut creases place light colour in the centre of the lid with darker colours on either side. Colourful cut creases use bright, contrasting shades for maximum impact.

Your Look with False Lashes

False lashes can totally transform your eye makeup from pretty to absolutely stunning. They add volume, length, and drama that even the best mascara can't quite achieve. While they might seem intimidating at first, the right technique makes application much easier than you'd expect.

Choosing the Right False Lashes

For beginners, start with natural-looking styles that aren't too long or dramatic. Individual lashes offer more control and look more natural than strip lashes. Consider your eye shape – longer lashes suit almond eyes, whilst shorter, voluminous ones work better on round or hooded eyes.
Makeup Small Eyeshadow Brush R81 pc

RENEE

Makeup Small Eyeshadow Brush R8

499

Application Tips for Seamless Integration

Trim the lashes to fit your eye shape before applying. Use a thin layer of lash glue and wait for it to become tacky before application. Apply as close to your natural lash line as possible, pressing gently from the centre outwards. Finish with mascara to blend your natural lashes with the false ones.

Caring for and Reusing False Lashes

Gently remove any glue residue after each use with tweezers. Store them in their original packaging to maintain their shape. Good quality lashes can be reused multiple times with proper care. Avoid getting mascara directly on false lashes if you want to reuse them.

Eye Makeup for Different Occasions

Different events definitely call for different levels of drama and sophistication in your eye makeup. What works for a casual coffee date might not be quite right for a formal evening event. Understanding how to adapt your techniques for various occasions helps you always look perfectly put-together.

Daytime Office Looks

Keep it professional with neutral tones and subtle definition. A wash of light brown or taupe across the lid with defined lashes usually hits the right note. Avoid glitter or overly dramatic colours that might distract in professional settings.

Glamorous Evening Makeup

This is your time to go bold with smokey eyes, dramatic lashes, or colorful eye makeup. Metallics and shimmers work beautifully under evening lighting. Don't be afraid to add some sparkle or try that winged eyeliner you've been practising.

Bridal Eye Makeup Tips

Bridal makeup should photograph well and last all day. Stick to classic techniques that won't look dated in photos years later. Waterproof formulas are essential, and consider having a touch-up kit ready. Practice your chosen look several times before the big day.

Frequently Asked Questions

How do I make my eye makeup last all day?

Start with eye primer to create a lasting base. Set your eyeshadow with a light dusting of translucent powder. Use waterproof mascara and eyeliner for the areas most prone to smudging. Avoid touching or rubbing your eyes throughout the day.

What's the best way to remove eye makeup without damaging my lashes?

Use a gentle, oil-based makeup remover specifically designed for eyes. Soak a cotton pad and gently press it against closed eyes for a few seconds before wiping away. Never rub or pull at your lashes – this can cause breakage and irritation.

Can I wear eye makeup if I have sensitive eyes?

Absolutely, but choose hypoallergenic and ophthalmologist-tested products. Avoid waterline application if you're particularly sensitive. Remove makeup thoroughly each night and replace products regularly to avoid bacterial buildup.

How often should I replace my eye makeup products?

Mascara should be replaced every 3-6 months, liquid eyeliners every 6 months, and powder eyeshadows can last 1-2 years if stored properly. If any product changes smell, texture, or causes irritation, replace it immediately regardless of age.

Final Thoughts

Mastering eye makeup is honestly one of the most rewarding beauty skills you can develop. From natural everyday looks to dramatic evening styles, having these techniques in your toolkit means you're ready for any occasion. Remember, the best eye makeup is the one that makes you feel confident and authentically you. Don't be afraid to experiment, make mistakes, and try something new – that's how you discover what truly works for your unique features and personal style.
Sangria Experience Logo
Document