8 Maybelline Concealer Hacks for Flawless Coverage

Full Coverage Concealer
Let's be real—getting flawless coverage with your concealer can feel like an art form. Whether you're dealing with stubborn dark circles, unexpected breakouts, or just want that perfect base, a good maybelline concealer can be your makeup bag's MVP. But here's the thing: it's not just about what you use, it's how you use it. These eight game-changing hacks will transform your concealer routine from good to absolutely brilliant, giving you that smooth, natural finish you've been after.
Before diving into the hacks, you need to know what makes a great concealer tick. Maybelline offers various formulas—from their liquid concealer options to stick formulations—each designed for different skin types and coverage needs. The key is understanding which formula works best for your skin and concerns. Choosing the right shade and formula isn't just about matching your skin tone. Consider your skin type, the areas you're covering, and how long you need the coverage to last. For instance, if you have makeup for oily skin needs, you'll want something that won't slide off by midday.
Getting your shade right is absolutely crucial for natural-looking coverage. Most people make the mistake of going too light, thinking it'll brighten their complexion. But here's what actually works: your concealer should be one shade lighter than your skin tone for under-eye areas and match your exact skin tone for blemish cover-up. The trick is to test shades in natural light when possible. Indoor lighting can be deceiving, and you don't want to end up with that obvious concealer line that screams 'amateur hour.'
Look at your wrist veins—if they appear blue or purple, you've got cool undertones. Green veins suggest warm undertones, whilst blue-green indicates neutral. This simple check helps you pick concealers that won't look ashy or orange on your skin.
Always swatch on your jawline, not your hand. Your hands are typically different in tone from your face. Blend the swatch and check if it disappears seamlessly into your skin—that's your perfect match.
Forget just dabbing concealer under your eyes. The triangle technique is where it's at for serious dark circle corrector action. Draw an upside-down triangle under each eye, with the base along your lower lash line and the point towards your cheek. This method doesn't just cover darkness—it actually lifts and brightens your entire eye area. The wider coverage area means no harsh lines and a more youthful appearance overall.

Full Coverage Concealer
Use a damp beauty sponge to blend outwards from the triangle's centre. Press, don't rub—rubbing will lift the product and create patchiness. Work in thin layers for buildable coverage that looks like your skin, just better.
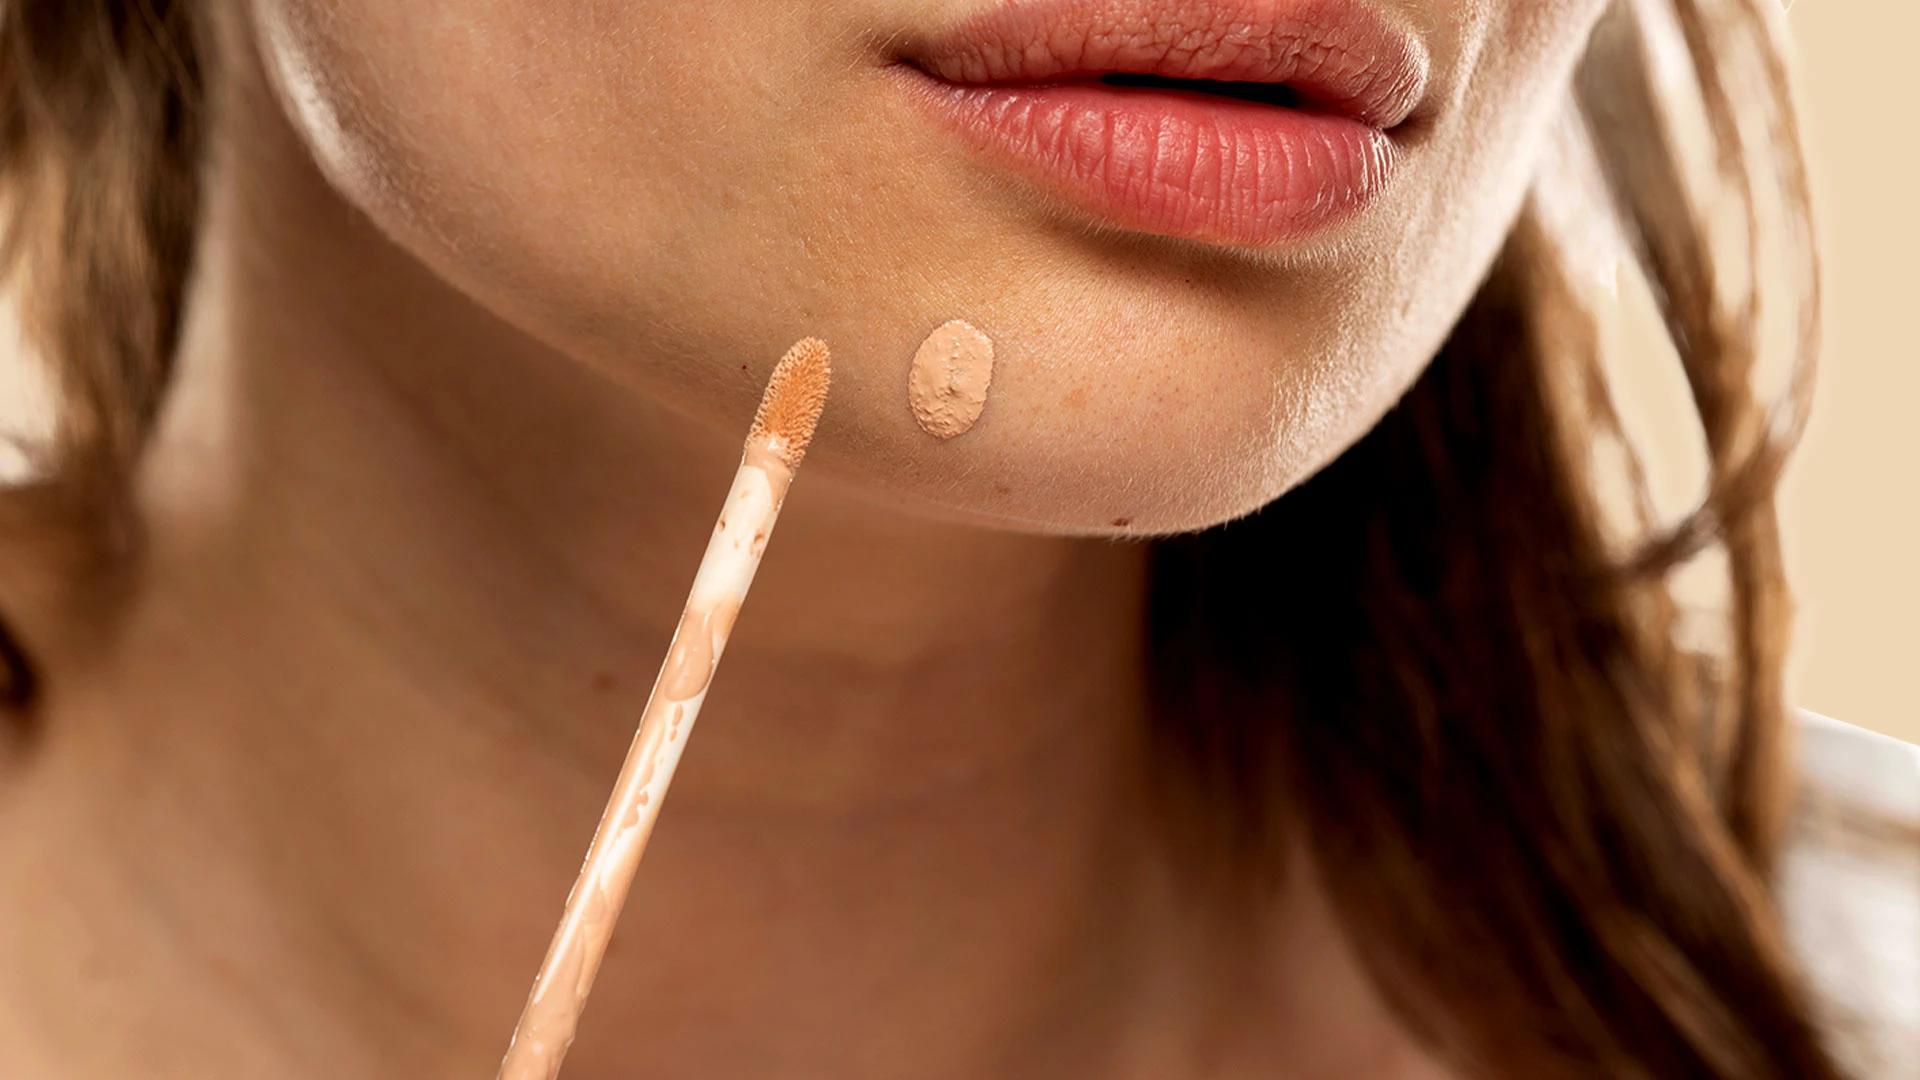
Spot concealing requires a different approach than under eye concealer application. For blemishes, use a small brush to apply concealer directly onto the spot, then gently pat the edges to blend. Don't drag the brush—this can move the product around and reduce coverage. For raised spots, apply concealer around the bump first, then carefully cover the top. This prevents the texture from showing through and gives you smoother-looking skin.
Red spots need green-toned correction before concealer, whilst dark spots benefit from peach or orange undertones. Many drugstore cosmetics now include color-correcting concealers that do this work in one step.
If you struggle with makeup for oily skin, prep is everything. Start with a mattifying primer in your T-zone, then apply thin layers of concealer rather than one thick layer. Thick application on oily skin is a recipe for creasing and fading. Choose formulas specifically designed for oily skin types—they typically have better staying power and oil control built in. Your long-lasting concealer should feel lightweight and set to a natural finish.
Set your concealer with a light dusting of translucent powder using a small fluffy brush. For extra staying power, try the 'baking' technique—apply a generous amount of powder, leave for 5 minutes, then brush away the excess.
Your concealer can do way more than just cover imperfections. It's brilliant for cleaning up eyebrow edges, making your lip colour pop as a base, and even spot-correcting small areas around your hairline where foundation might have rubbed off. Think of it as your makeup emergency kit in a tube. A few strategic dabs can fix most makeup mishaps without having to start over.

Built to Cover Concealer
Use a concealer two shades lighter than your skin as a highlighter on your cheekbones, bridge of your nose, and cupid's bow. It's more subtle than traditional highlighters and perfect for daytime looks.
When you need serious coverage, layering is your friend. Start with a thin layer, let it set for a minute, then build up gradually. This prevents the cakey look that comes from applying too much product at once. The key to successful layering is patience. Each layer needs time to settle into your skin before adding the next. Rush this process, and you'll end up with a patchy, uneven finish.
For ultimate coverage, try layering different textures. Start with a liquid concealer for smooth blending, then spot-correct with a stick formula for extra coverage where needed. This gives you the best of both worlds.
Here's a money-saving trick that actually works brilliantly—use concealer as your eyeshadow base. Apply a thin layer over your lids and blend well. This creates a neutral canvas that makes your eyeshadows appear more vibrant and last longer. This hack is particularly useful when travelling or for those building their makeup collection on a budget. One product doing double duty means more room in your makeup bag and wallet.
Set your concealer eye base with a light powder before applying eyeshadow. This prevents creasing and gives your colour something to grip onto, resulting in better colour payoff and all-day wear.
For targeted coverage, try the eraser technique using a concealer with a precise applicator. This involves applying small dots exactly where you need coverage, then blending outwards in tiny circular motions. This method is perfect for covering individual blemishes or small dark spots without disturbing the surrounding makeup. It's all about precision rather than broad application.

Liquid Light Weight Concealer With Full Coverage
Different areas of your face need different approaches. Under-eyes require gentle patting motions, whilst the T-zone can handle more blending. Adjust your technique based on the area you're working on for the best results.
Look for hydrating formulas with ingredients like hyaluronic acid. Avoid matte finishes and opt for concealers with a natural or dewy finish that won't cling to dry patches.
Use thin layers, set with powder, and ensure your skin is properly moisturised before application. A good eye cream can also help prevent creasing in the under-eye area.
Absolutely! Concealer can be worn alone for a natural, spot-corrected look. Just ensure you blend the edges well so there are no obvious lines where the concealer stops.
Fit Me offers buildable coverage with a natural finish, whilst Age Rewind typically provides fuller coverage with anti-aging benefits. Choose based on your coverage needs and skin concerns.
These eight maybelline concealer hacks can seriously transform your makeup routine. From perfecting your shade match to mastering application techniques, each tip builds on the others to give you that flawless coverage you're after. Remember, great concealer application is all about technique, patience, and finding what works for your unique skin. Don't be afraid to experiment with different methods—your perfect routine might be a combination of several of these hacks. The key is practice and finding your rhythm with these affordable beauty products that can deliver professional-looking results.
