7 Pro Contouring Techniques for Flawless Makeup

Let's be real—contouring can feel like rocket science when you're staring at your reflection with a makeup brush in hand. One minute you're watching a tutorial thinking "this looks easy," and the next you're wondering why your cheekbones have vanished into thin air. But here's the thing: professional contouring isn't about following a one-size-fits-all formula. It's about understanding your unique features and knowing which techniques actually work for your face shape. This best contouring guide breaks down seven game-changing techniques that makeup artists swear by—the kind that transform good makeup into absolutely stunning results.
Think of contour makeup as your face's personal lighting crew. While highlighters bring features forward, contouring creates depth and dimension by mimicking natural shadows. The difference between amateur and professional results? It's all in the technique.
Most contouring guides focus on basic placement, but these seven methods go deeper. They're based on how light naturally hits your face, not just where you think shadows should go. Each technique serves a specific purpose—whether you're working with a round face that needs more angles or an oval face that just needs subtle enhancement.
The beauty of mastering these methods is that they're adaptable. Once you understand the principles, you can mix and match techniques depending on your mood, the occasion, or even the lighting you'll be in. No more guessing games or hoping for the best.
Before diving into techniques, let's talk about what you'll actually need. The right tools can make or break your contouring for beginners journey, and honestly, you don't need to break the bank to get professional results.
When it comes to best contour products, the golden rule is simple: go two to three shades darker than your natural skin tone, and always choose matte finishes. Shimmer belongs in your highlighter, not your contour.
Cream contours work brilliantly for dry skin and give that seamless, skin-like finish. They're also more forgiving for beginners because they blend easily and don't set immediately. Powder contours, on the other hand, are perfect for oily skin and offer more precision—ideal when you've mastered the basics and want sharper definition.
Here's what actually matters: the undertone of your contour shade. Cool undertones work for most people, but if you have very warm skin, a slightly warmer contour shade will look more natural. Test products on your jawline in natural light—that's where you'll see the true colour payoff.
Your brush choice can completely change your results. Angled brushes are your best friend for precise placement, while fluffy blending brushes help soften harsh lines. A damp beauty sponge is perfect for that final blend, especially around the edges where your contour meets your foundation.
Don't overlook your fingers, though. Sometimes the warmth of your fingertips is exactly what cream contour needs to blend seamlessly. Clean hands work just as well as expensive tools for certain techniques.

Sculpt Lift Contour Palette

Facelift MultiSlayer Contour Stick
Ready for the good stuff? These contouring techniques are what separate Instagram-worthy makeup from everyday looks. Each one serves a different purpose, and once you master them, you'll never struggle with placement again.
This face contouring tutorial staple focuses on the three main areas where shadows naturally fall: the temples, under the cheekbones, and along the jawline. Start by sucking in your cheeks slightly to find the hollow—that's where your contour goes, not on the apple of your cheek.
Apply contour in a curved line from your ear towards the corner of your mouth, but stop about two fingers' width away from your mouth. Blend upwards and outwards, never downwards, which can create a droopy effect.
This method combines blush and contour for a naturally flushed, dimensional look. Apply your contour as usual, then layer a complementary blush colour on top, focusing on the apples of your cheeks. The key is choosing colours that work together—think warm browns with peachy blushes or cool taupes with pink tones.
Instead of applying contour in one solid line, this technique builds colour gradually. Start with a light application and build intensity slowly, blending between each layer. This creates the most natural-looking depth and prevents harsh lines that scream "makeup."
For nose contouring, less is definitely more. Draw two thin lines down the sides of your nose, starting from the inner corners of your eyebrows. The key is keeping these lines straight and parallel—any curves will actually make your nose look wider.
Blend gently with a small, fluffy brush, and remember: the goal isn't to completely change your nose shape, but to create subtle definition that photographs beautifully.
This technique focuses on the eye area, using contour to define the crease and create the illusion of deeper-set eyes. Apply a light contour shade in your crease, blending upwards towards the brow bone. This works especially well for hooded eyes or anyone wanting more dramatic eye definition.
Perfect for creating a more defined jawline, this technique involves contouring along the underside of your jaw and blending down onto your neck. The trick is to tilt your head up slightly while applying, so you can see exactly where the shadow should fall.

Ace of Base High Coverage Contour, Corrector & Concealer Palette

Ariana Makeup Palette
This comprehensive approach maps out your entire face, considering how all the contoured areas work together. It's about creating harmony between your forehead, cheeks, nose, and jawline, ensuring everything looks proportional and natural.
Here's where contouring for different face shapes gets interesting. Your face shape determines not just where you contour, but how intensely and in which direction you blend. Understanding this is crucial for easy contouring that actually enhances your features.
For round faces, the goal is creating angles where curves naturally occur. Focus your contour along the sides of your forehead, under your cheekbones, and along your jawline. Blend in straight lines rather than curves to add definition.
Avoid contouring the apples of your cheeks, which will only emphasise roundness. Instead, keep your contour in the hollows and blend upwards towards your temples.
Square faces benefit from softening those strong angles. Contour the corners of your forehead and jawline, blending in circular motions to create softer transitions. Focus on the outer edges rather than the centre of your face.
Lucky you—oval faces are naturally balanced, so your contouring can be subtle and focused on enhancement rather than correction. Light contouring under the cheekbones and along the jawline is usually enough to add dimension without changing your natural proportions.
Heart-shaped faces often have wider foreheads and narrower chins. Contour the sides of your forehead to reduce width, and use a lighter hand on the jawline to avoid making your chin appear even smaller.
For longer faces, horizontal contouring is your friend. Focus on the top of your forehead and under your chin to create the illusion of a shorter face. Keep cheek contouring minimal to avoid elongating your face further.

Glam Star Makeup Palette
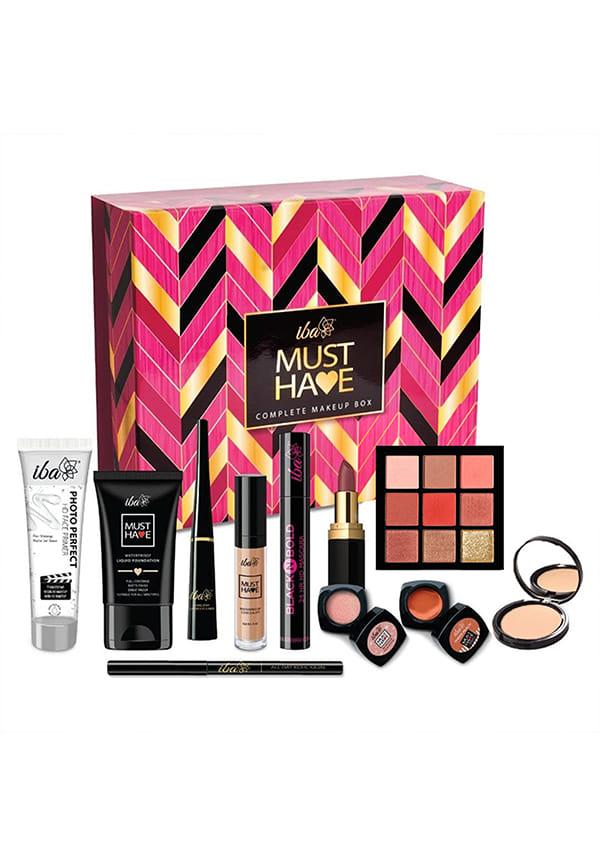
Must Have Complete Makeup Box
Loved the Kit
“Nice awesome , i just loved thisss this kit”
Dry Foundation
“Everything is good but the foundation looks too dry.”
Let's break down how to contour in a way that actually makes sense. This step-by-step approach takes the guesswork out of the process and gives you a solid foundation to build on.
Start with clean, moisturised skin and your usual base makeup. Your foundation should be completely set before you begin contouring—this prevents muddiness and ensures clean lines. A light dusting of translucent powder can help if you're using cream contour products.
Take a moment to study your face in natural light. Where do shadows naturally fall? These are the areas you'll enhance with contour. Use a light hand initially—you can always build up intensity, but it's much harder to tone down heavy-handed application.
Apply your contour in thin layers, building gradually. Start with the largest areas (cheekbones and jawline) before moving to smaller details like nose contouring. Blend immediately after each application to prevent harsh lines from setting.
Once you're happy with your contour, set everything with a light dusting of translucent powder. This locks your work in place and prevents it from moving throughout the day. Add your highlighter last for that final pop of dimension.
Even with the best contouring tips, mistakes happen. The most common issue? Going too dark, too fast. If your contour looks muddy, try blending with a clean, damp sponge to soften the intensity.
Harsh lines are another frequent problem. The solution is better blending tools and more patience. Take your time with the blending process—it's where the magic really happens.
Wrong shade selection can make your contour look orange or ashy. When in doubt, test shades on your jawline in natural light. The right shade should look like a natural shadow, not like you've applied makeup.
Asymmetry is normal—faces aren't perfectly symmetrical. Focus on enhancing your natural features rather than trying to create perfect symmetry. Sometimes the slight imperfections are what make your makeup look natural and beautiful.

Festa Beauty Essentials Makeup Kit for Women, Long Lasting Makeup Kit Combo

Shine on Face Highly Pigmented Makeup Palette
If you're exploring different contour products and techniques, platforms like Smytten make it easy to try various brands without committing to full-size purchases. With trial packs from trusted makeup brands, you can discover which formulas work best for your skin type and preferred application method.
The seven essential rules include: choose the right shade (2-3 tones darker), blend immediately, work in thin layers, follow your natural bone structure, use matte products only, set with powder, and practice in natural light. These principles ensure natural-looking results every time.
Cream contour sticks or palettes are ideal for beginners because they're more forgiving and easier to blend. Look for buildable formulas that won't set too quickly, giving you time to perfect your blending technique.
Start with proper base preparation, map your face to identify natural shadow areas, apply contour in thin layers, blend immediately, and build intensity gradually. The key is patience and practice—rushing the process often leads to harsh, unnatural results.
Test shades on your jawline in natural light. The perfect contour shade should be 2-3 tones darker than your skin with cool undertones. It should look like a natural shadow, not orange or muddy when blended.
Absolutely! Dry skin benefits from cream formulas, while oily skin works better with powder contours. Sensitive skin should opt for gentle, fragrance-free formulas, and mature skin often looks best with cream products that won't settle into fine lines.
Mastering professional contouring isn't about following rigid rules—it's about understanding your unique features and choosing techniques that enhance them. These seven methods give you a toolkit for any occasion, whether you want subtle everyday definition or dramatic evening glamour.
Remember, the best contour is one that looks like it could be your natural bone structure on an exceptionally good day. It's not about changing your face completely, but about highlighting what's already beautiful about your features.
The key to success? Practice, patience, and the right products for your skin type. Don't be afraid to experiment with different techniques until you find what works for your lifestyle and skill level. With these professional methods in your beauty arsenal, you'll never have to wonder if your contour looks right again.
