The Ultimate Checklist for Natural Looking Blush Application

 10gm
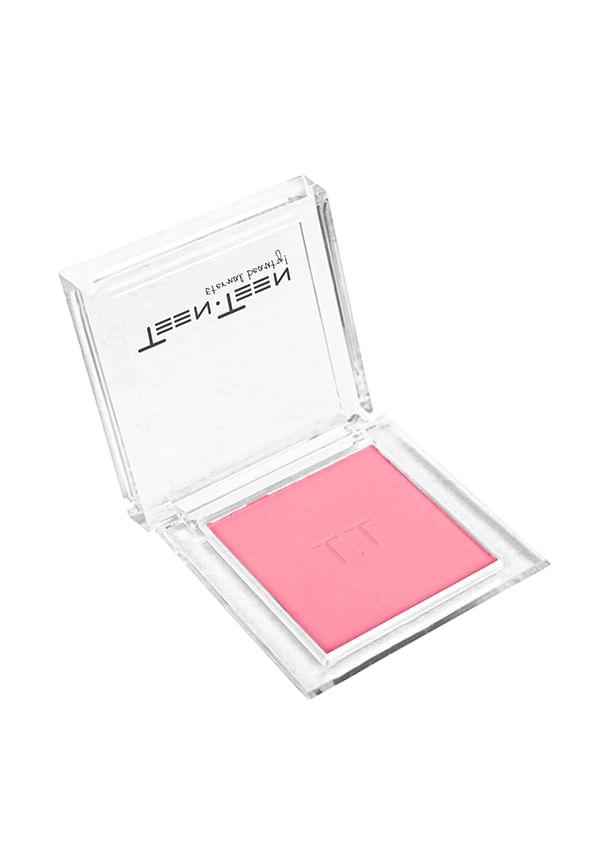
10gmThe Ultimate Perfect Mineral Blush Powder
Getting that perfect natural looking blush application can feel like chasing a unicorn—you know it exists, but somehow it always feels just out of reach. One day you're looking fresh and glowing, the next you're wondering if someone slapped you with a pink paddle. The thing is, natural blush isn't about following one rigid rule; it's about understanding your face, your skin tone, and the subtle art of blending. Whether you're team cream blush or powder blush, the goal remains the same: that effortless flush that makes people wonder if you just came back from a lovely walk or if you're just naturally that radiant.
Let's be real—there's a fine line between looking naturally flushed and looking like you raided a child's face paint kit. Natural blush application is all about mimicking how your skin naturally flushes when you're happy, excited, or slightly embarrassed. Think about where you naturally go pink: usually the apples of your cheeks, sometimes your nose, and occasionally your temples.
Natural blush should look like it's coming from within your skin, not sitting on top of it. The key signs you've nailed it include seamless blending with no harsh edges, colour that complements your natural undertones, and intensity that matches what your skin would naturally do.
Common mistakes that scream 'artificial' include applying too much product at once, choosing colours that fight with your undertones, placing blush too low on the face, and forgetting to blend properly. The 'lit-from-within' effect happens when your blush enhances your natural colouring rather than competing with it.
Different formulas require different approaches, and understanding these blush application techniques can make all the difference.
Cream blush application works best on bare skin or over light foundation. Use your fingers or a damp beauty sponge to pat and blend the colour into your skin. The warmth of your fingers helps the cream melt seamlessly into your complexion.
Powder blush application requires a good brush and a light hand. Tap off excess product before applying, and build colour gradually. Powder blush works brilliantly over set makeup and tends to last longer throughout the day.
Here's where things get interesting—your face shape actually influences where you should place your blush for the most natural, flattering effect. It's not just about slapping colour on the apples of your cheeks and calling it a day.
The 'smile rule' is your starting point: smile naturally and apply blush to the rounded part of your cheeks that becomes prominent. However, for a more lifted, youthful look, place your blush slightly above the apples of your cheeks, following the line from the outer corner of your eye towards your ear.
This higher placement creates an instant lifting effect and looks more sophisticated than the traditional apple placement. Use the outer corner of your eyes as a guideline—your blush should never extend beyond this point towards your nose.
For oval faces, you've won the genetic lottery—classic cheekbone placement works beautifully. Apply blush along the cheekbone, blending upwards towards the temples.
If you have a round face, focus on elongating with temple blending. Apply blush higher on the cheekbones and blend upwards and outwards towards the temples to create length.
Heart-shaped faces benefit from softening angular features. Apply blush to the apples of the cheeks and blend outwards, avoiding the temple area which can emphasise the wider forehead.
For square faces, create softness with upper cheekbone focus. Apply blush high on the cheekbones and blend in circular motions to soften angular jawlines.
 3 gm
3 gmMadness pH Blush
Colour choice can make or break your natural blush game. The wrong shade will look obvious and artificial, while the right one will have people asking about your skincare routine instead of your makeup.
If you have fair skin, soft pinks, light corals, and peachy tones are your best friends. These shades enhance your natural colouring without overwhelming your delicate complexion.
Consider your undertones: cool undertones pair beautifully with rosy pinks and berry shades, while warm undertones glow with peach and coral tones. Avoid anything too bright or deep—you want to enhance, not compete with your natural palette.
Rich berries, deep plums, and warm oranges create stunning natural flushes on darker skin tones. The key is choosing shades with enough pigment to show up beautifully on your complexion.
For olive and golden undertones, warm oranges and coral shades create gorgeous natural dimension. Don't be afraid of intensity—your skin can handle richer colours that would overwhelm lighter complexions.
Medium skin tones have the most versatility—warm rose, mauve, and coral shades all work beautifully. You can adjust seasonally, going for warmer tones in summer and cooler shades in winter.
The key is building intensity gradually. Start with a light application and build up until you achieve that perfect natural flush.
Your tools can make or break your blush game. The right brush makes blending effortless, while the wrong one can leave you with patchy, uneven colour.
A fluffy, angled brush is ideal for powder blush—it picks up just the right amount of product and allows for precise placement. Synthetic bristles work well for cream formulas, while natural bristles are perfect for powder.
Alternative tools include your fingers for cream blush (the warmth helps with blending) and damp beauty sponges for seamless cream blush application. Some people swear by stippling brushes for a more diffused, natural effect.
The tapping motion method involves gently tapping your brush on the back of your hand to remove excess product before application. This prevents over-application and ensures even colour distribution.
Use circular motions for seamless blending, starting from the centre of your placement area and working outwards. Build colour intensity gradually—it's much easier to add more than to remove excess. Always blend the edges to create natural-looking colour transitions.
 120 ml
Way to Glow Body Shimmer Spray! | Nourishes skin | For body radiance | Enhance skin texture | Daily skin care | 120ml
Ready for the actual application? This step-by-step process will help you achieve that coveted natural flush every single time.
Start with clean, moisturised skin. If you're using foundation, apply and set it first—blush should be one of your final steps. For cream blush, apply before powder; for powder blush, apply after setting your base.
Prepare your product by swirling your brush in the blush (for powder) or warming cream blush on the back of your hand. This ensures even application and prevents patchy results.
First, find your placement points using the smile rule or the outer eye corner guideline. Load your brush with a small amount of product—you can always build up.
Apply the initial colour using gentle, sweeping motions. Start with less than you think you need. Blend immediately using circular motions, working from the centre outwards.
Build colour intensity gradually by adding thin layers rather than one heavy application. Step back and assess in natural light—artificial lighting can be deceiving.
For final touches, blend any harsh edges and ensure the colour looks seamless with your skin. If you've applied too much, use a clean, fluffy brush to diffuse the colour.
Once you've mastered basic application, these advanced techniques will take your natural blush game to the next level.
For that just-been-in-the-sun glow, add a tiny amount of blush to your nose bridge and temples. This mimics where you naturally catch colour from the sun.
Connect your blush with other face areas by adding a whisper of the same shade to your chin and forehead. This creates cohesion and enhances the natural, flushed makeup look.
Layer highlighter on top of blush for added dimension, or apply blush slightly below your highlighter placement. The key is ensuring they complement rather than compete with each other.
Avoid the 'stripe' effect by blending the edges where blush and highlighter meet. The goal is seamless, natural-looking dimension.
Even the best of us have blush disasters. Here's how to fix the most common issues without starting over.
 16 gm
16 gmUltra Blush Palette
If you've applied too much, use a clean, fluffy brush to diffuse the colour. For powder blush, you can also use a damp beauty sponge to lift excess product.
Harsh lines can be softened by blending with a clean brush in circular motions. If the colour is completely wrong, apply a thin layer of foundation or concealer over the area and start again.
For those with rosacea, choose neutral, muted shades that won't compete with natural redness. Peach and coral tones often work better than pink shades.
In hot weather, set your blush with a light dusting of translucent powder to ensure longevity. Cream formulas tend to last longer in humid conditions.
With so many blush options available, finding your perfect shade and formula doesn't have to involve expensive trial and error. Smytten offers curated trial packs from trusted makeup brands, letting you explore different blush formulas and shades before committing to full-size purchases. You can get up to 8 minis for just ₹249, with 100% cashback redeemable for future orders—making it easy to discover your ideal natural blush without the guesswork.
Start with less product than you think you need, place it slightly above the apples of your cheeks, and blend thoroughly using circular motions. Build colour gradually and always check your application in natural light.
It depends on the formula. Cream blush works beautifully with fingers as the warmth helps it blend seamlessly. Powder blush is best applied with a fluffy, angled brush for even distribution and precise placement.
The most natural blush shade mimics your natural flush. For fair skin, try soft pinks or peaches. Medium skin tones suit warm roses and corals. Darker skin tones look stunning in rich berries and warm oranges.
Absolutely! Choose neutral, muted shades like peach or coral that complement rather than compete with natural redness. Avoid bright pinks or reds that might emphasise the condition.
Both can look natural when applied correctly. Cream blush tends to look more skin-like and natural, while powder blush offers more control and longevity. Choose based on your skin type and preference.
If you can see obvious colour sitting on top of your skin rather than blending seamlessly, or if the intensity doesn't match what your skin would naturally do, you've probably applied too much. Always build gradually.
Mastering natural looking blush application is about understanding your unique features and working with them, not against them. The perfect flush should enhance your natural beauty and make you look like the best version of yourself—healthy, glowing, and effortlessly put-together.
Remember, the best blush application techniques are the ones that work for your specific face shape, skin tone, and lifestyle. Don't be afraid to experiment with different formulas, shades, and placement until you find your perfect combination. With practice and the right products, that natural, radiant flush will become second nature.
