How to Do Easy Makeup for Beginners Step by Step
 30 gm
30 gmPerfect Look BB Cream With 24 Karat Gold -Medium Shade
Let's be real—starting your makeup journey can feel like learning a new language. Between contouring tutorials that look like art class and influencers using 20 products for a "natural" look, it's no wonder beginners feel overwhelmed. But here's the thing: great makeup doesn't need to be complicated. This easy makeup tutorial breaks down everything you need for a gorgeous, natural look that takes just 15 minutes. We're talking about makeup for beginners that actually makes sense—no fancy techniques, no expensive tools, just simple steps that work. Whether you're getting ready for work, uni, or just want to feel put-together, this guide will have you sorted. Ready to discover your new everyday routine?
Before diving into techniques, let's talk about building your makeup kit without breaking the bank. The beauty industry loves to convince us we need everything, but a solid foundation routine starts with just a few key products. Think of this as your starter pack—you can always add more later, but these basics will get you through any simple makeup looks you want to create. The secret to beginner makeup tips that actually work? Start small and build confidence with each product you master. You don't need a full vanity setup to look amazing.
Your base is everything, so let's get this right. A good moisturiser with SPF does double duty—it preps your skin and protects it. Look for something lightweight that absorbs quickly. Primer can feel like an extra step, but it helps your makeup last longer and look smoother. If you're going for that effortless vibe, a good moisturiser can sometimes do the job. Foundation doesn't have to be full coverage to look good. A lightweight foundation or skin tint gives you that natural, "your skin but better" finish that's perfect for everyday wear. Concealer is your secret weapon for covering blemishes and brightening under your eyes—just a small tube goes a long way.
For eyes, a neutral eyeshadow palette is your best friend. Those "boring" brown and beige shades? They're actually the most versatile colours you'll ever own. A few basic brushes—a fluffy blending brush and a flat shader—will handle most of your eyeshadow needs. Blush brings life back to your face, bronzer adds warmth, and highlighter gives that subtle glow everyone's after. Mascara opens up your eyes, and a brow gel keeps everything looking polished. These products form the foundation of any basic makeup guide worth following.
Great makeup starts with great skin prep—it's not just beauty guru nonsense, it actually makes a difference. When your skin is properly prepped, your makeup goes on smoother, looks more natural, and lasts longer throughout the day. This step sets you up for success with any natural makeup tutorial you're following. Think of skin prep as creating the perfect canvas. You wouldn't paint on a rough surface, right? Same principle applies here.
Start with clean skin—use your regular cleanser if you're doing this in the morning, or just splash with water if your skin isn't oily. Pat dry gently, then apply your moisturiser in upward motions. Give it a minute to absorb properly. SPF is non-negotiable, even if you're staying indoors. UV rays come through windows, and protecting your skin now means better skin later. If your moisturiser doesn't have SPF, layer a separate sunscreen on top. Let everything settle for a few minutes before moving to the next step.
Colour-correcting sounds fancy, but it's actually quite simple. If you have redness around your nose or chin, a green-tinted primer can help neutralise it. Dark circles? A peach or orange corrector works wonders before concealer. That said, colour-correcting isn't essential for every natural makeup tutorial. If you're happy with how your skin looks with just foundation and concealer, skip this step entirely. The goal is to feel confident, not to follow every rule in the book.
 4.5 gm
Dual Passport Eyeshadow Palette
Now for the fun part—creating that flawless base that doesn't look like you're wearing a mask. The key to a good foundation routine is building coverage gradually rather than slapping on a thick layer and hoping for the best. Your skin should still look like skin, just better. Remember, foundation isn't meant to completely change your face. It's there to even out your skin tone and give you a smooth canvas for the rest of your makeup.
Choosing the right shade is crucial—test foundation on your jawline, not your hand or wrist. The right shade should disappear into your skin. When in doubt, go slightly lighter rather than darker. For application, you've got options. A damp beauty sponge gives the most natural finish—bounce it over your skin rather than dragging it. A foundation brush works well for building coverage, while clean fingers can work for lighter formulas. Start with a small amount and build up where needed. Apply foundation in sections—forehead, cheeks, nose, chin—then blend outward. Don't forget your neck and ears if they need evening out. The goal is seamless blending so there are no obvious lines where your makeup starts and stops.
Concealer goes on after foundation, not before. This way, you only use it where you actually need extra coverage. For under-eyes, apply in an upside-down triangle shape and blend upward toward your temples. For blemishes, use a small brush or your finger to pat concealer directly on the spot. Don't rub—just press and blend the edges. If you're using concealer to brighten, apply it down the centre of your nose, on your chin, and on your forehead for a subtle highlighting effect.
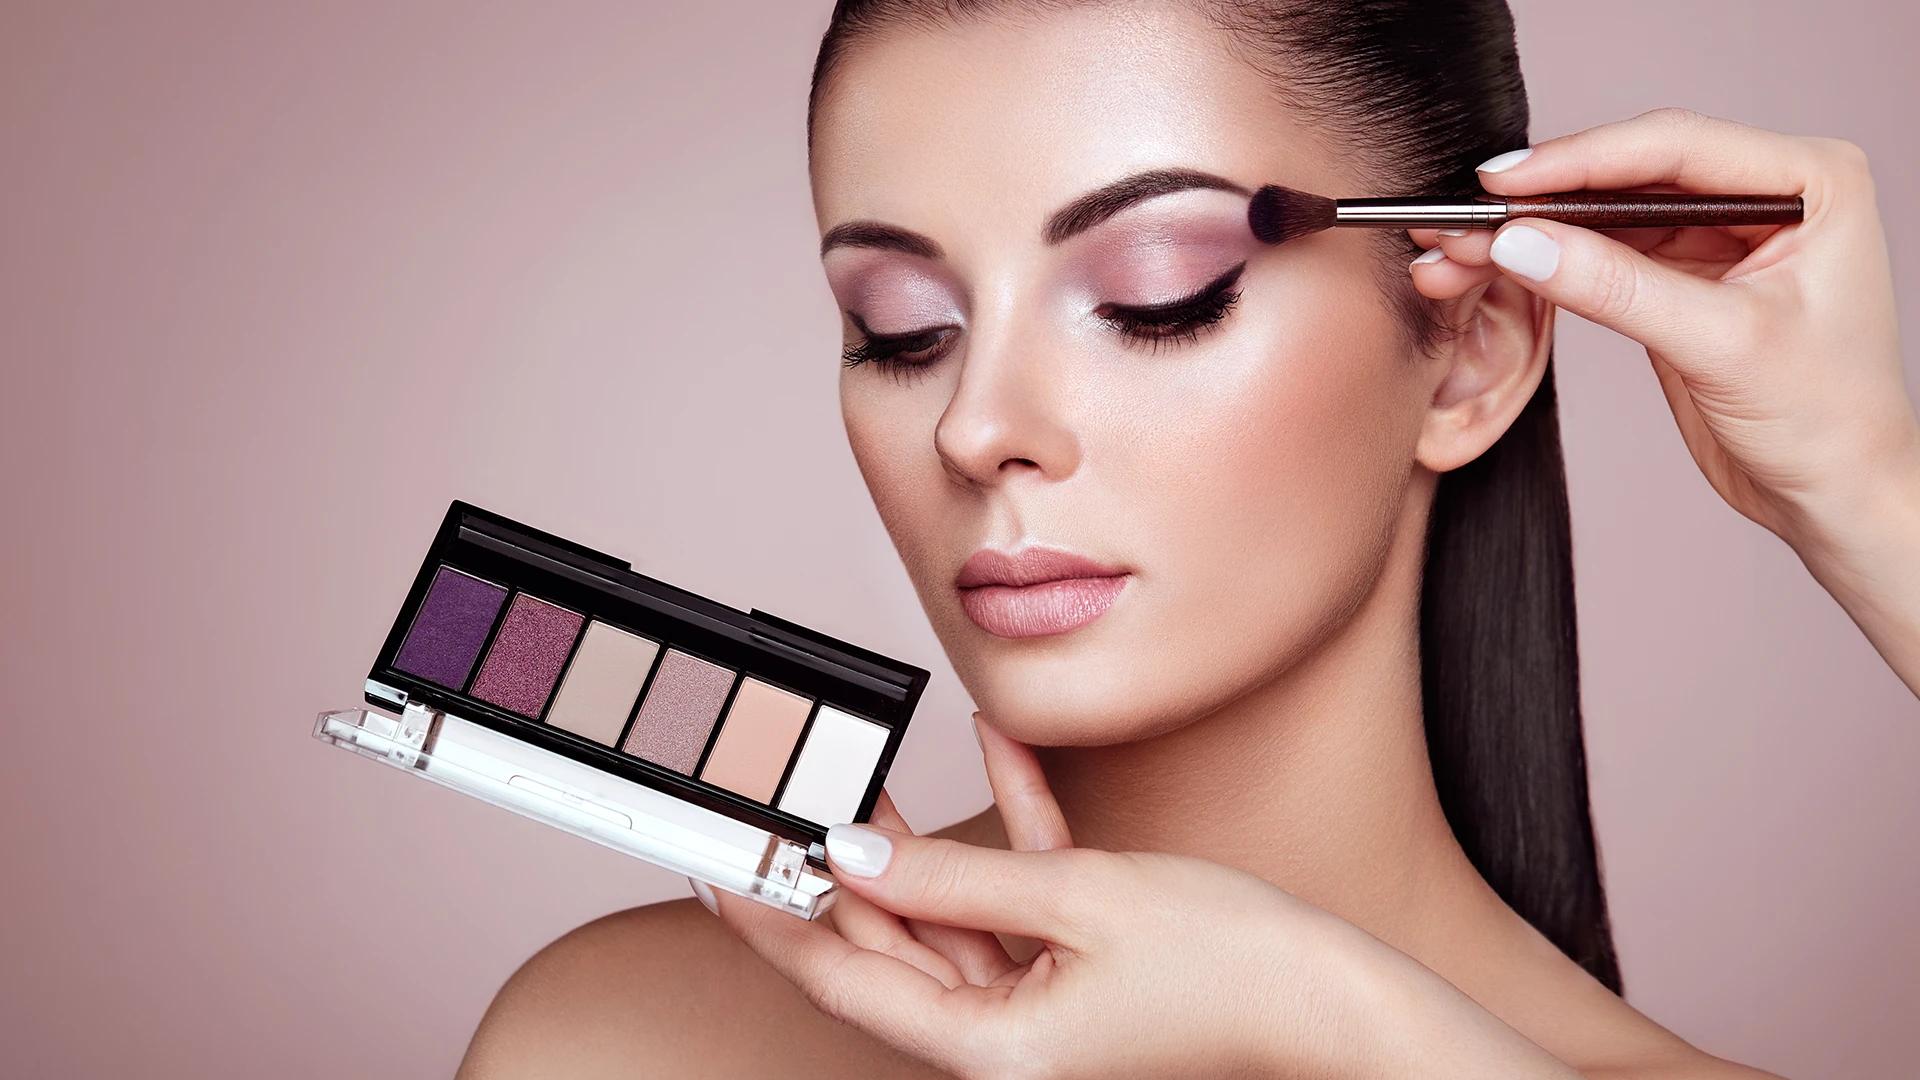
Eyeshadow intimidates a lot of beginners, but it doesn't have to be complicated. The trick is starting with neutral shades that are forgiving and easy to blend. This easy eyeshadow tutorial focuses on creating depth and dimension without looking overdone—perfect for those simple makeup looks you can wear anywhere. The beauty of neutral eyeshadow is that it's nearly impossible to mess up. Even if your blending isn't perfect, neutral tones are so close to your natural skin that small mistakes aren't noticeable.
Start with a light, matte shade close to your skin tone and sweep it across your entire eyelid as a base. This creates a smooth canvas and helps other colours blend better. Next, take a medium brown shade and apply it to your crease using a fluffy brush in windshield wiper motions. For definition, use a slightly darker shade in the outer corner of your eye, blending it into the crease colour. If you want to add a bit of brightness, pat a light, shimmery shade on the inner corners of your eyes and the centre of your eyelids. The key to blending is using a clean brush and working in small circles. Don't press too hard—let the brush do the work. If you make a mistake, use a clean blending brush to soften harsh lines.
Mascara is probably the most transformative product in your makeup bag. Before applying, give your lashes a gentle curl with an eyelash curler. Start at the base of your lashes and wiggle the mascara wand slightly as you pull upward. One or two coats is usually enough for a natural look. For brows, use a spoolie brush to comb them upward, then fill in any sparse areas with a brow pencil or powder that matches your hair colour. Finish with a clear or tinted brow gel to keep everything in place. Eyeliner isn't necessary for every look. If you want to add definition, try tightlining—applying liner to your upper waterline—for a subtle enhancement that makes your lashes look thicker.
 3 ml
3 mlLiquid Lipstick
This is where your everyday makeup tutorial really comes to life. Adding colour back to your face after foundation is what makes the difference between looking washed out and looking naturally radiant. The trick is building colour gradually—you can always add more, but it's harder to take away. Think about how your face looks after a brisk walk outside—that's the natural flush we're trying to recreate with makeup.
Finding the apples of your cheeks is easier than you think—just smile naturally and apply blush to the rounded part that pops up. Use a fluffy brush and tap off excess product before applying. Start light and build up the colour gradually. For a natural look, choose a blush colour that mimics your natural flush. Peachy tones work well on most skin tones, while pink shades are great for cooler undertones. Apply blush in upward strokes toward your temples for a lifting effect. Common mistake alert: applying blush too low on your face can drag your features down. Keep it on the apples and upper cheek area for the most flattering effect.
Bronzer should look like a natural sun-kiss, not like you've been rolling in dirt. Apply it where the sun would naturally hit your face—forehead, cheeks, nose, and chin. Use a large, fluffy brush and blend well. For highlighting, less is more. Apply highlighter to the high points of your face: cheekbones, bridge of your nose, inner corners of your eyes, and your cupid's bow. The goal is a subtle glow, not a disco ball effect. If you're new to bronzer and highlighter, cream formulas can be easier to blend than powders. You can apply them with your fingers and blend seamlessly into your foundation.
Now let's put it all together into a streamlined routine that works for busy mornings. This quick makeup tutorial covers everything you need for a polished look without the stress. The key is having your products organised and following a logical order that builds on each step. With practice, this routine becomes second nature. You'll be amazed how much faster you get once you know exactly what you're doing.
Start with skincare and SPF while you're getting dressed—this gives everything time to absorb. Apply primer or let your moisturiser set, then move on to foundation and concealer. Do your eyes next while the base sets, then add blush, bronzer, and highlighter. Finish with mascara and a quick lip colour if you want. This order prevents smudging and ensures each product has time to set properly. Multi-use products are your friend here—a cream blush that works on lips, or a bronzer that doubles as eyeshadow. Time-saving tip: prep your makeup the night before. Having everything laid out and ready makes your morning routine much smoother.
Patchy foundation? It usually means your skin wasn't prepped properly or you didn't blend well enough. Use a damp sponge to bounce over any patchy areas and smooth everything out. If your eyeshadow looks muddy, you probably used too much product or didn't blend with a clean brush. Use a clean blending brush to soften harsh lines, or apply a light shade over the muddy area to tone it down. For harsh blush lines, blend the edges with a clean brush or use a light dusting of translucent powder to soften the colour.
 30 ml
30 mlSerum Foundation
Start with a simple routine: moisturise with SPF, apply foundation, add concealer where needed, use neutral eyeshadow, apply mascara, add blush, and finish with a natural lip colour. Focus on mastering one step at a time rather than trying to perfect everything at once.
Follow this order for best results: skincare and SPF, primer (optional), foundation, concealer, eyeshadow, mascara, bronzer/blush/highlighter, brows, and lips. This sequence prevents smudging and allows each product to set properly.
A natural look focuses on enhancing your features rather than dramatically changing them. Use lightweight foundation, neutral eyeshadows, a subtle blush, and mascara. The goal is to look like yourself, just more polished.
A basic everyday look should take 10-15 minutes once you get the hang of it. When you're learning, give yourself 20-30 minutes to practice without rushing. Speed comes with practice and familiarity with your products.
Absolutely! Many drugstore brands offer excellent quality products that work just as well as expensive alternatives. Focus on finding the right shades and formulas for your skin rather than worrying about price points.
If your makeup looks obvious or feels heavy on your skin, you're probably using too much. Start with less than you think you need and build up gradually. It's always easier to add more than to remove excess.
Mastering an easy makeup tutorial is all about practice and patience with yourself. Remember, even the most skilled makeup artists started as beginners once. The key is focusing on techniques that enhance your natural beauty rather than trying to transform into someone else entirely. Start with one or two products and gradually build your routine as you get more comfortable. There's no rush to master everything at once—makeup should be fun, not stressful. Whether you're trying products from established brands or discovering new favourites, the most important thing is finding what works for your lifestyle and makes you feel confident. Smytten makes this journey even easier by offering trial-sized versions of over 1,500 trusted beauty brands. Instead of committing to full-size products you might not love, you can try different foundations, eyeshadows, and blushes until you find your perfect match. With trial packs available for just ₹249 and 100% cashback on your purchases, you can experiment with makeup for beginners without the financial pressure. After all, why settle for maybe when you can try it all and find exactly what makes you feel amazing?
