How to Apply Eyeshadow Like a Pro: Beginner's Guide
 13 gm
13 gmBasic Kit Eyes | Eyeshadow Palette| Long wearing and Easily Blendable Eye makeup Palette
Let's be real—eyeshadow can feel like rocket science when you're starting out. One minute you're watching a tutorial thinking "this looks easy," and the next you're staring at muddy colours wondering where it all went wrong. But here's the thing: learning how to apply eyeshadow doesn't have to be overwhelming. With the right techniques and a bit of practice, you can create gorgeous eyeshadow looks that'll have everyone asking for your secrets. Whether you're after a natural everyday vibe or want to try your hand at a smokey eye, this eyeshadow tutorial will break down everything you need to know. Ready to transform your eye game? Let's dive in.
Before we jump into the fun stuff, let's sort out the fundamentals. Think of this as your eyeshadow foundation course—once you've got these basics down, everything else becomes so much easier.
Not all eyeshadows are created equal, and knowing the difference can make or break your look. Powder eyeshadows are your best friend as a beginner—they're forgiving, easy to blend, and perfect for building up colour gradually. Cream eyeshadows give you that gorgeous, seamless finish but can be trickier to work with since they set quickly. Liquid eyeshadows are brilliant for that intense, metallic pop but require a steady hand.
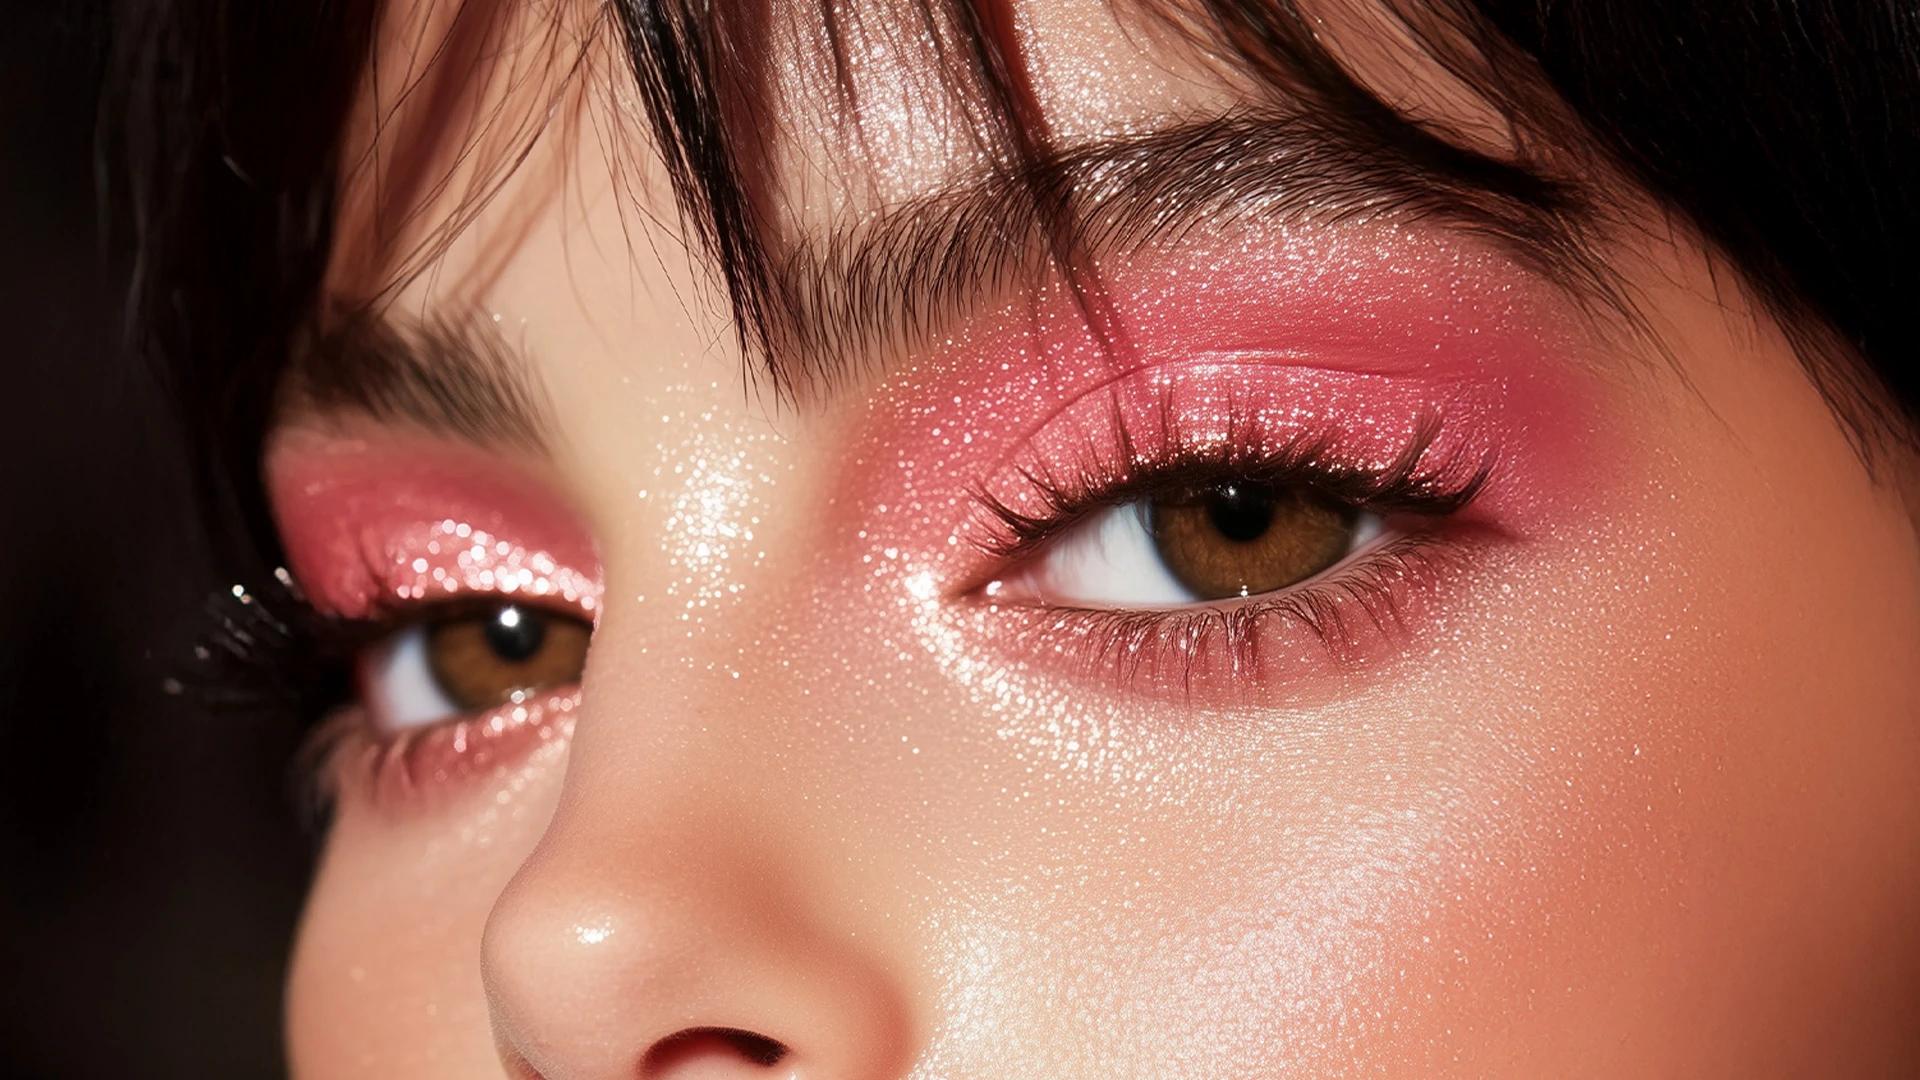
When it comes to finishes, matte shades are perfect for creating depth and definition, especially in your crease. Shimmer eyeshadows add that lovely sparkle to your lids, whilst metallic finishes are your go-to for dramatic, statement looks.
Your brushes are honestly half the battle when it comes to eyeshadow for beginners. You don't need a massive collection—just a few key players will sort you right out.
A fluffy blending brush is absolutely essential—this is your workhorse for seamless colour transitions. A flat shader brush helps you pack colour onto your lids with precision. For detailed work like your lower lash line or inner corners, a small pencil brush is perfect. And here's a pro tip: always have a clean, fluffy brush on standby for blending out any harsh lines.
Starting with a neutral eyeshadow palette is honestly the smartest move. Look for palettes with a mix of light, medium, and dark shades in browns, taupes, and peachy tones—these work on literally everyone. Once you're comfortable with these eyeshadow colors, you can branch out into bolder territories.
Right, let's get into the actual application. This easy eyeshadow application method will have you looking like a pro in no time.
Trust me on this—eyeshadow primer is a game-changer. It creates a smooth base, makes your colours pop, and keeps everything in place all day. If you don't have primer, a tiny bit of concealer or foundation followed by a light dusting of translucent powder works brilliantly too.
This is where the magic starts. Choose a shade that's just slightly deeper than your skin tone—think of it as your eyeshadow's best supporting actor. Using your fluffy blending brush, apply this colour in the crease using gentle windshield wiper motions. This creates a soft gradient that makes blending the rest of your eyeshadow looks seamless.
 20.8 gm
Perfection Eyeshadow Palette
Now for the star of the show. Using your flat shader brush, pat (don't sweep) your chosen lid colour across your mobile eyelid. Patting helps the colour stick better and gives you more intensity. If you're using a shimmer shade, this technique really makes it pop.
Time to add some drama. Take a slightly smaller brush and apply a deeper shade to your outer corner, creating a soft 'V' shape. Blend this upwards and outwards, connecting it with your transition shade. This step is what transforms a flat look into something with real dimension.
The finishing touches make all the difference. Pop a light, shimmery shade on your inner corners and just under your brow bone. This instantly opens up your eyes and gives you that fresh, awake look—even on those Monday mornings.
Here's where we separate the amateurs from the pros. Mastering these eyeshadow blending techniques will take your looks from good to absolutely stunning.
This is your go-to blending motion. Hold your brush parallel to your eye and move it back and forth in small, controlled movements—just like windshield wipers. Use light pressure and build up the colour gradually. The key is patience; rushing this step is where most people go wrong.
Think of eyeshadow application like painting a sunset—you want smooth transitions between colours, not harsh lines. Always start with your lightest shade and work your way up to the darkest. If things start looking muddy, grab a clean brush and blend in circular motions to soften everything out.
Here's something most tutorials don't tell you: you need to clean your brushes between colours. A quick swirl on a tissue or brush cleaning mat prevents colours from getting muddy. It might seem fiddly, but it's the difference between amateur and professional-looking eyeshadow looks.
Let's put all this theory into practice with some foolproof looks that are perfect for building your confidence.
 1N
1NPRO Fluffy Eyeshadow Blending Brush
This is your bread and butter—a simple two-shade look that works for absolutely everything. Choose a light, neutral shade for your lid and a slightly deeper tone for your crease. Blend well, add a touch of mascara, and you're sorted. This look takes about five minutes once you get the hang of it.
This is the foundation of most eyeshadow tutorials and for good reason—it works every time. Light shade on the lid, medium tone in the crease, and a darker shade in the outer corner. The key is choosing shades that are in the same colour family but different depths.
Forget what you think you know about smokey eyes—they don't have to be dramatic or difficult. Start with brown shades instead of black (much more forgiving), and focus on blending rather than intensity. A brown smokey eye is perfect for beginners and works for both day and night.
We've all been there—let's talk about the most common slip-ups and how to avoid them.
Patchy eyeshadow usually comes down to three things: skipping primer, using poor-quality brushes, or trying to apply too much colour at once. Always prep your lids, invest in decent brushes (they don't have to be expensive), and build your colour gradually.
Eyeshadow fallout is the absolute worst, especially when you've already done your base makeup. Always tap excess product off your brush before applying, and consider doing your eye makeup before your foundation. Keep some makeup wipes handy for quick cleanup.
There's a fine line between perfectly blended and over-blended mush. If you've gone too far, don't panic—you can usually rescue it by adding back some definition with a slightly deeper shade. Sometimes it's easier to start fresh, and that's okay too.
Not all eyes are created equal, and that's brilliant—it just means you might need to tweak your technique slightly.
If you have hooded eyes, traditional eyeshadow placement might not work for you. Focus your darker shades slightly higher than your natural crease, and keep shimmer shades on your mobile lid rather than extending them up towards your brow bone.
 20 gm
20 gmC2P PROFESSIONAL MAKE UP Deep Rose Eyeshadow Palette
For smaller eyes, light and bright is your mantra. Stick to lighter eyeshadow colors on your lids and use darker shades sparingly. A light, shimmery shade on your inner corners and centre of your lids will make your eyes appear larger and more open.
Deep-set eyes can handle more dramatic looks beautifully. Don't be afraid to bring lighter, shimmery shades up towards your brow bone, and you can be a bit more generous with your lid colours since they won't appear as intense as they would on more prominent eyes.
Start with primer, apply a transition shade in your crease, add your main colour to your lid, deepen the outer corner, and finish with highlights. Take your time with each step and blend as you go. Practice makes perfect, so don't expect perfection on your first try.
If you're really pressed for time, focus on these three: transition shade in the crease, main colour on the lid, and a touch of highlight in the inner corner. This gives you a complete look in under three minutes once you've got the technique down.
Keep it simple with shades close to your skin tone. Use a light peachy or taupe shade on your lid, a slightly deeper tone in your crease, and finish with a subtle highlight. The key is blending everything seamlessly so it looks like your natural eye colour, just enhanced.
Use clean brushes between colours, build up intensity gradually, and don't over-blend. If things start looking muddy, it's usually because you've mixed too many colours or used a dirty brush. Sometimes less is more.
While there are traditional colour theory rules, the best approach is to experiment and see what you love. That said, warm browns and golds work beautifully on most people, making them perfect starting points for beginners.
Learning how to apply eyeshadow is honestly one of those skills that gets better with practice. Don't expect to nail it on your first go—even the pros had to start somewhere. The key is to be patient with yourself and remember that makeup should be fun, not stressful.
If you're keen to experiment with different eyeshadow looks without committing to full-size products, platforms like Smytten make it so much easier to discover what works for you. With curated trial packs from trusted brands, you can explore different formulas, colours, and finishes before investing in full-size products. After all, why settle for 'maybe' when you can try it all and find your perfect eyeshadow palette?
Remember, the best eyeshadow look is the one that makes you feel confident and happy. Whether that's a simple wash of neutral colour or a bold, dramatic eye, the techniques in this guide will help you achieve whatever look you're after. Keep practising, keep experimenting, and most importantly, have fun with it.
