7 Pro Tips for Perfect Face Highlighting Now
 25 gm
25 gmWay to Glow! Illuminating Strobe Cream - 01 Rose Gold
Face highlighting has become the secret weapon for that perfect glow everyone's obsessing over. But here's the thing—it's not just about slapping some shimmer on your cheeks and calling it a day. The magic lies in understanding the best highlighting placement for your unique features. Whether you're new to makeup highlighting or looking to level up your strobing game, these seven pro tips will transform how you approach face highlighting. From choosing the right product for your skin tone to mastering advanced highlighting techniques, we're about to dive into everything that'll make your glow absolutely worth obsessing over.
Let's be real—face highlighting isn't just about adding sparkle to your face. It's actually a clever way to work with light and shadow to enhance your natural bone structure. When you apply highlighter to the right spots, you're essentially mimicking where light would naturally hit your face, creating dimension and that coveted healthy glow.
The science behind it is pretty fascinating. Light reflects off raised surfaces, so when you place highlighter on the high points of your face, you're creating the illusion of those areas being more prominent. This is what makes your cheekbones look more defined, your nose appear straighter, and your overall features more sculpted.
Common mistakes that make highlighting look unnatural include applying too much product at once, choosing the wrong undertone for your skin, or placing highlighter in spots that don't naturally catch light. The key is to build up gradually and focus on areas where light would realistically hit your face.
For proper highlighting techniques, you'll need a few essential tools: a fluffy highlighting brush for powder products, a damp beauty sponge for cream formulas, and your fingers for quick touch-ups. The right tools make all the difference in achieving that seamless, professional finish.
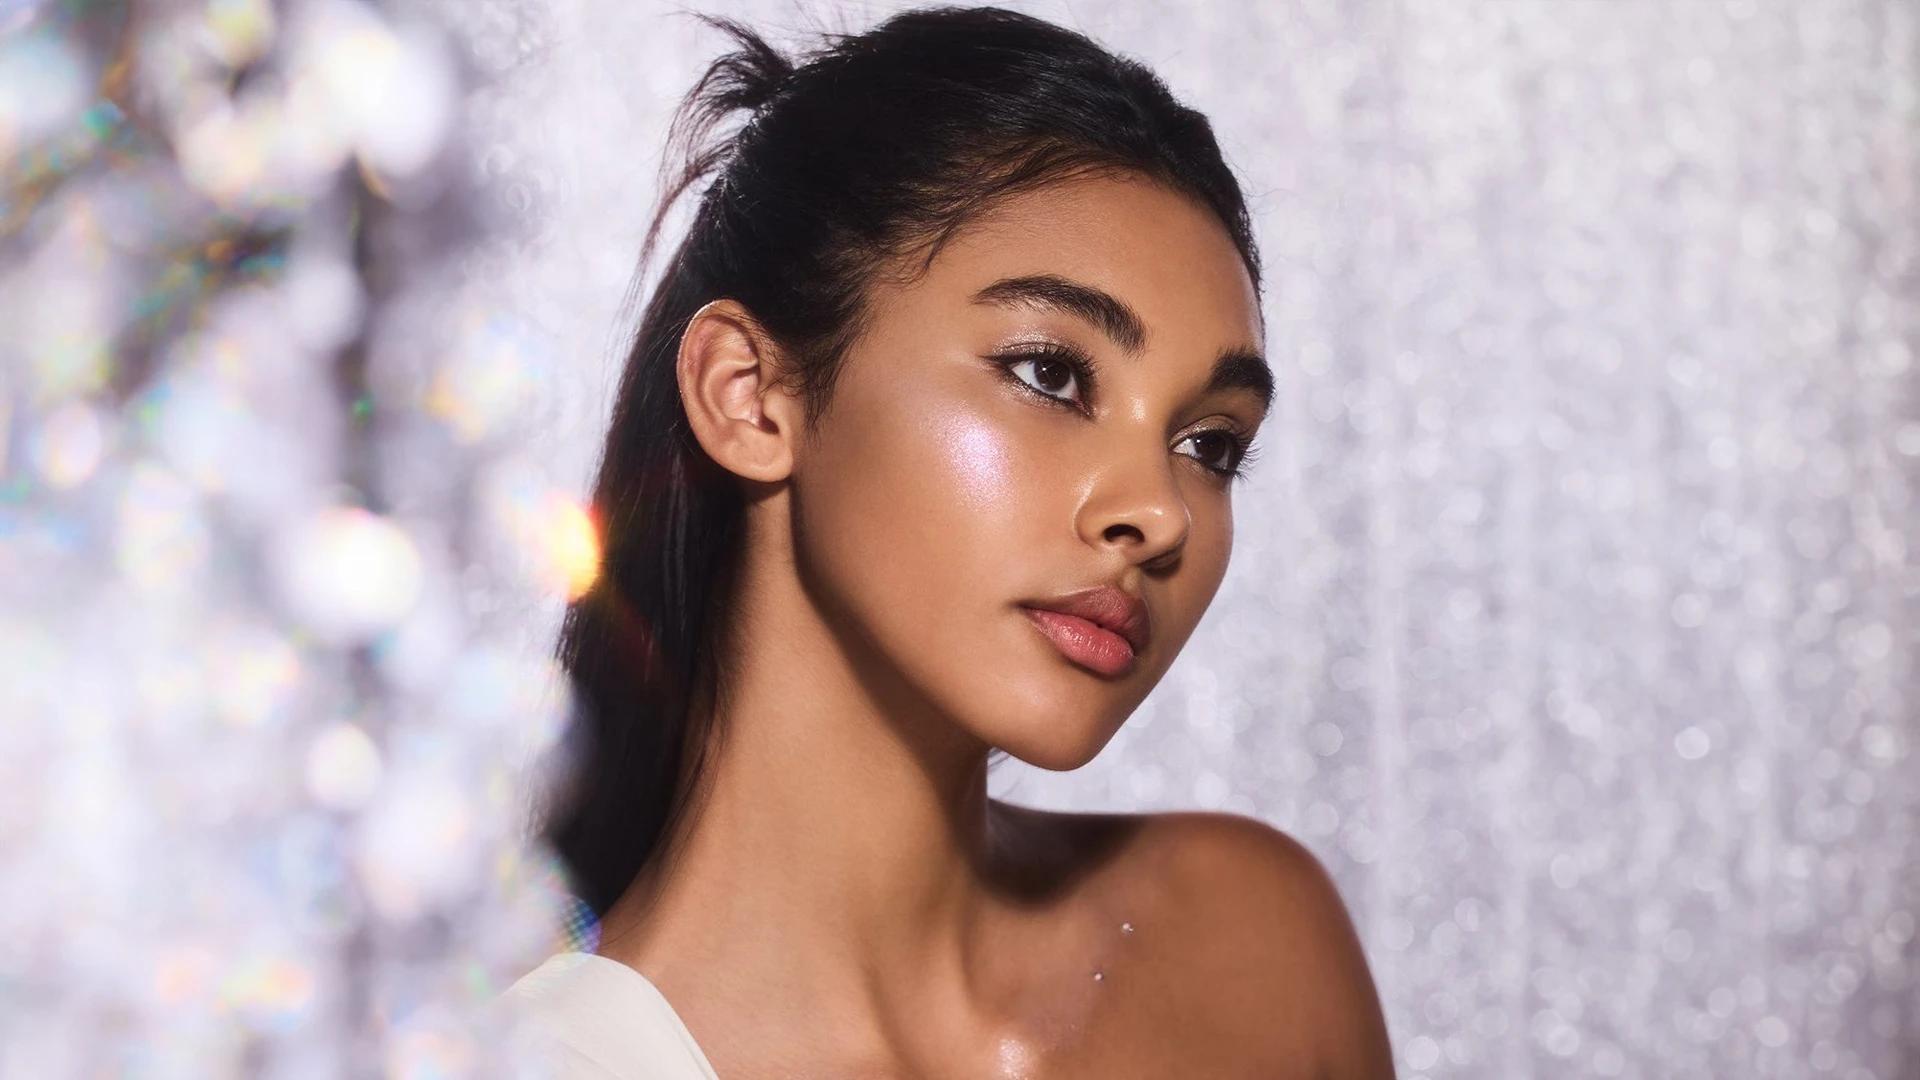
The best highlighting placement focuses on the high points of your face—those areas that naturally catch and reflect light. Think of your face as a landscape, and you're adding sunshine to the peaks and ridges.
Start with the classic spots: the tops of your cheekbones, bridge of your nose, cupid's bow, and the centre of your chin. These are your non-negotiable highlighting zones that work for virtually everyone. Apply highlighter in a gentle sweeping motion, building up the intensity gradually rather than going heavy-handed from the start.
Once you've mastered the basics, you can explore advanced placement areas. The inner corners of your eyes instantly make you look more awake and bright-eyed. A touch on your brow bone lifts and opens up your eye area. The temples can add width to a narrow face, whilst a subtle highlight on your forehead creates a youthful, dewy finish.
Round faces benefit from vertical highlighting down the centre of the nose and forehead to create length. Square faces should focus on the cheekbones and temples to soften angular features. Heart-shaped faces look amazing with highlighting on the chin and jawline to balance a wider forehead. Long faces can use horizontal highlighting across the cheekbones to add width.
 100 ml
Prep Set Glow
Your skin tone is your best guide when selecting the perfect highlighter shade. This isn't about following trends—it's about finding what makes your natural complexion look its absolute best.
For warm undertones, look for highlighters with golden, peachy, or bronze undertones. Cool undertones shine with silver, pink, or icy champagne shades. Neutral undertones are lucky—you can pull off both warm and cool-toned highlighters, so feel free to experiment based on your mood or the look you're going for.
The finish you choose depends on your skin type and the vibe you want. Powder highlighters work brilliantly on oily skin and give more control over intensity. Cream highlighters blend seamlessly into dry skin and create that natural, skin-like glow. Liquid highlighters are perfect for mixing with foundation or applying under makeup for subtle radiance.
For natural highlighting, choose shades that are only one or two tones lighter than your skin. If you're into strobing makeup and want that dramatic glow, you can go bolder with your shade selection, but remember—it's always easier to build up than to tone down.
Now that you've got the basics down, let's talk about taking your highlighting game to the next level. Advanced highlighting techniques can completely transform your makeup routine and give you that professional, editorial finish.
Natural highlighting is all about subtlety. Use a light hand and blend thoroughly for a glow that looks like it's coming from within your skin. This technique works perfectly for daytime wear or when you want that effortless, no-makeup makeup look.
Strobing makeup focuses entirely on highlighting without any contouring. It's about creating an all-over luminous finish that makes your skin look healthy and radiant. Apply highlighter to all the traditional spots, but also add touches to your collarbones, shoulders, and anywhere you want to catch the light.
Professional makeup highlighting often involves layering different products. Start with a cream highlighter close to your skin tone, then add a powder highlighter on top for extra dimension. This technique gives you the most natural base with added sparkle where you want it most.
 210 gm
Grow X Glow
Different situations call for different highlighting approaches. What looks perfect in natural daylight might appear too subtle under evening lighting, and what's gorgeous for a night out might be overwhelming for a video call.
For daytime highlighting, keep it subtle and natural. Use champagne or pearl tones that enhance your skin without looking obvious. Evening highlighting can be more dramatic—this is when you can really play with intensity and even add some sparkle to catch the artificial lighting.
Photography-friendly highlighting requires a bit more strategy. Avoid highlighters with too much glitter, as they can create unwanted texture in photos. Stick to finely-milled powders or cream formulas that photograph beautifully. For video calls, place your highlighter slightly higher on your cheekbones than usual, as the camera angle can change how your features appear.
Seasonal adjustments matter too. Summer highlighting can be more golden and bronzed to complement your tan, whilst winter highlighting might lean cooler and more subtle to match your skin's natural tone during colder months.
Getting your highlight to last all day requires some strategic planning. The key is in your prep work and setting techniques.
Start with properly moisturised skin—highlighting looks best on smooth, hydrated skin. If you're using cream highlighter, apply it before powder products. For powder highlighter, make sure your base makeup is completely set first.
Setting your highlight depends on the formula you're using. Cream highlighters can be set with a light dusting of translucent powder, whilst powder highlighters usually stay put on their own. For extra longevity, try using a setting spray specifically designed for makeup.
Touch-up strategies are essential for maintaining your glow throughout the day. Carry a small highlighting compact for quick refreshers, especially if you're attending events or spending long days out. Blot away any excess oil first, then reapply lightly.
When it comes to removal, be gentle. Use a proper makeup remover or cleansing oil to dissolve the product completely. This prevents buildup that can clog pores or make future applications look patchy.
Building a sustainable highlighting routine means finding products and techniques that work with your lifestyle. If you're always rushing in the morning, master a quick one-product technique. If you love experimenting, invest in a variety of formulas to play with different looks.
This is where platforms like Smytten become incredibly valuable for makeup enthusiasts. With access to trial-sized highlighters from trusted brands, you can experiment with different formulas and shades without committing to full-size products. Whether you're testing a new strobing technique or finding your perfect everyday glow, having the option to try before you buy makes discovering your ideal highlighting routine both affordable and exciting.
 Combo
ComboSun-Kissed Radiance Kit: Lumi Glow Cream + Pore Minimizing Sunscreen SPF 70 PA++++ Face Gel
Start with just the tops of your cheekbones and the bridge of your nose. These two spots will give you the most impact with minimal effort. Once you're comfortable with these areas, gradually add the cupid's bow and chin to your routine.
Consider your skin type and the finish you want. Cream highlighters work beautifully on dry skin and give a natural, skin-like glow. Powder highlighters are better for oily skin and offer more control over intensity. If you're unsure, cream formulas are generally more forgiving for beginners.
The basic placement points work for everyone, but you can adjust the technique based on your face shape. Round faces benefit from vertical highlighting, whilst square faces look great with softer, more diffused application on the cheekbones.
Highlighting is typically part of a contour and highlight routine, whilst strobing focuses entirely on adding glow without any contouring. Strobing uses more product and covers more areas of the face for an all-over luminous effect.
If you've applied too much highlighter, gently blend it out with a clean, fluffy brush. You can also lightly dust translucent powder over the area to tone down the intensity. For cream highlighters, use a damp beauty sponge to lift some product.
Mastering face highlighting is all about understanding your unique features and working with them, not against them. The best highlighting placement isn't a one-size-fits-all approach—it's about finding what works for your face shape, skin tone, and personal style.
Remember, highlighting should enhance your natural beauty, not mask it. Start subtle, build gradually, and don't be afraid to experiment with different techniques and products. Whether you're going for natural highlighting for everyday wear or dramatic strobing for special occasions, the key is practice and finding what makes you feel most confident.
The beauty of makeup highlighting lies in its versatility. Once you understand these fundamental techniques, you can adapt them to suit any look or occasion. From quick morning routines to elaborate evening glam, proper highlighting placement will always be your secret weapon for that perfect glow.
