How to Master Simple Hair Cutting at Home

How to Master Simple Hair Cutting at Home
Published Date - 22 July 2025
Cuticle Scissor1 Unit

VEGA

Cuticle Scissor

350
Let's be real—there's nothing quite like leaving the salon with that fresh haircut feeling. But what if you could capture that same confidence from your own bathroom? DIY hair trimming has become your kind of game-changer, especially when salon visits aren't always on the cards. Mastering simple hair cutting at home isn't just about saving money—it's about taking control of your haircare routine and discovering what works for your unique style. With the right techniques and a bit of practice, you'll soon be trimming like a pro.

Essential Tools for Simple Hair Cutting

Having the right tools makes all the difference between a decent trim and a disaster. Think of these as your haircare arsenal—each piece has a specific job that contributes to your success. Quality tools don't have to break the bank, but investing in a few key items will make your at-home haircut experience so much smoother. Here's what you'll need for your DIY hair trimming setup: • **Sharp hairdressing scissors** (never use kitchen scissors—trust us on this one) • **Fine-tooth comb** for precise sectioning • **Wide-tooth comb** for detangling • **Hair clips** to section off areas • **Spray bottle** for keeping hair slightly damp • **Good lighting** and a large mirror • **Small handheld mirror** for checking the back When choosing scissors, look for ones specifically designed for hair cutting. They'll stay sharp longer and give you cleaner cuts. Your future self will thank you for this investment.

Preparing for Your At-Home Haircut

Preparation is half the battle when it comes to successful beginner hair cutting methods. Creating the right environment sets you up for success and helps you feel more confident about the process. Good prep work also means fewer surprises and better results. Start by washing your hair with your usual routine, but skip heavy conditioners that might weigh it down. Slightly damp hair is easier to work with than completely wet or dry hair. Find a well-lit area—natural light is ideal, but bright bathroom lighting works too. Section your hair into manageable parts using clips. This basic hairstyling technique prevents you from cutting too much at once and helps you maintain control throughout the process. Work in small sections rather than trying to tackle everything at once.

Basic Hairstyling Techniques for Beginners

The foundation of simple hair cutting lies in mastering a few key techniques. These methods form the backbone of most easy haircuts and will serve you well regardless of your hair type or desired style. Once you've got these down, you'll feel much more confident about tackling your trim.

The Point Cutting Method

Point cutting creates soft, natural-looking ends by cutting vertically into the hair rather than straight across. Hold your scissors vertically and make small snips into the ends of each section. This technique works brilliantly for adding texture and preventing that harsh, blunt line.

The Blunt Cutting Method

For clean, straight lines, the blunt cut is your go-to. Hold the hair taut between your fingers and cut straight across with sharp scissors. This method works well for bobs and creating defined shapes. Remember to keep your scissors parallel to the floor for the most even results.

The Layering Technique

Layers add movement and dimension to your hair. Start by sectioning horizontally and work from bottom to top. Each layer should be slightly shorter than the one below it. This technique requires patience, so take your time and check your progress frequently.

Step-by-Step Guide to Simple Hair Cutting

Now for the main event—actually cutting your hair. These at-home haircut tips will walk you through the most common scenarios you'll encounter. Remember, you can always cut more, but you can't put hair back once it's gone.

Trimming Split Ends

Start with this simple technique before moving on to more complex cuts. Work through small sections, looking for damaged ends. Cut about half an inch above the split to ensure you've removed all the damage. This quick hair trim trick keeps your hair looking healthy between major cuts.

Creating Layers

For face-framing layers, start by parting your hair down the middle. Take small sections from the front and cut at a slight angle, with the shortest part near your face. Work your way back gradually, maintaining the same angle for consistency.

Cutting Bangs

Bangs can be tricky, so start conservative. Section off the area you want to cut and clip the rest away. Cut straight across, then use point cutting to soften the edges. Remember—you can always trim more, but growing out too-short bangs is a waiting game.

Quick Hair Trim Tricks for Maintenance

Between full haircuts, these maintenance tricks keep your style looking fresh. They're perfect for those moments when you need a quick refresh but don't have time for a full styling session. These no-fuss haircut ideas will become your secret weapons.

Dusting for Split Ends

Dusting involves trimming just the very tips of your hair—literally removing "dust" amounts. Twist small sections and snip any protruding ends. This technique maintains length while keeping your hair healthy.

Refreshing Layers

If your layers are losing their shape, focus on the pieces around your face. These frame your features most prominently, so keeping them neat makes the biggest visual impact. A few strategic snips can refresh your entire look.

Bang Trim Techniques

For bang maintenance, trim when they're dry and styled as usual. Cut vertically into the hair rather than straight across to avoid that choppy, homemade look. Work slowly and step back frequently to assess your progress.

Low-Maintenance Hairstyles Perfect for DIY Cutting

Some styles are naturally more forgiving and easier to maintain at home. These low-maintenance hairstyles work well with basic hair shaping techniques and don't require perfect precision to look good. They're ideal if you're just starting your self-haircut guide journey.

The Classic Bob

A bob is surprisingly forgiving because small imperfections often add character. Focus on getting the general length right, then use point cutting to soften any harsh lines. The key is keeping the back slightly shorter than the front for that classic bob shape.

Textured Pixie Cut

Pixie cuts rely on texture rather than perfect lines, making them ideal for DIY cutting. Use the point cutting method throughout to create movement and avoid that "helmet" look. Work in small sections and embrace the natural texture of your hair.

Long Layers

Long layers are forgiving because any slight unevenness blends naturally into the overall style. Start with subtle layers and build up gradually. This style works particularly well if you're nervous about cutting too much at once.

Common Mistakes to Avoid in DIY Hair Cutting

Learning from others' experiences can save you from haircut disasters. These common pitfalls catch many first-time DIY cutters, but knowing about them beforehand puts you at an advantage. Prevention is definitely better than trying to fix a cutting mishap.

Cutting Too Much at Once

The biggest mistake is being too ambitious with your first cut. Start with small trims—you can always cut more if needed. This approach lets you adjust as you go and prevents those "oh no" moments that lead to emergency salon visits.

Ignoring Hair Texture and Type

Different hair types behave differently when cut. Curly hair springs up more than straight hair, while fine hair shows every imperfection. Research techniques specific to your hair type before you start cutting.

Using Inappropriate Tools

Regular scissors create jagged cuts that damage your hair and look unprofessional. Kitchen scissors, craft scissors, and even dull hairdressing scissors can ruin your results. Sharp, proper tools are worth the investment.

Tips for Specific Hair Types

Your hair's unique characteristics affect how it should be cut and styled. Understanding these differences helps you adapt general techniques to work with your specific hair type. What works for your mate might not work for you, and that's perfectly normal.

Cutting Curly Hair

Curly hair should be cut when dry so you can see its natural pattern. Cut each curl individually rather than in straight lines. Remember that curly hair shrinks up when it dries, so be conservative with your cuts.

Trimming Fine or Thin Hair

Fine hair shows every mistake, so precision matters more here. Use very sharp scissors and make clean cuts. Avoid heavy layering, which can make thin hair look even thinner. Instead, focus on subtle shaping and healthy ends.

Managing Thick or Coarse Hair

Thick hair can handle more dramatic cuts and benefits from thinning techniques. You might need to make multiple passes to cut through all the hair cleanly. Work in smaller sections and take breaks to avoid hand fatigue.

Frequently Asked Questions

How often should I trim my hair at home?

Most people benefit from trims every 6-8 weeks, but this depends on your hair type and how quickly it grows. If you're just maintaining length and health, you might trim less frequently than someone trying to grow out a particular style.

Can I use regular scissors for cutting hair?

Regular household scissors aren't designed for hair and will create jagged, damaged cuts. Invest in proper hairdressing scissors—they're sharper, stay sharp longer, and give much better results.

How do I fix a bad at-home haircut?

If you've made a mistake, stop cutting immediately. Sometimes letting your hair settle for a day or two helps you assess the damage more objectively. For major mistakes, it's worth visiting a professional who can work with what you've got.

Is it possible to cut my own hair if it's very long?

Long hair is actually easier to cut than short hair because small mistakes are less noticeable. Focus on trimming the ends and creating subtle layers. Use multiple mirrors to check your work from all angles.

How can I achieve a professional-looking result at home?

Take your time, use proper tools, and work in good lighting. Cut small amounts at a time and step back frequently to assess your progress. Practice makes perfect, so start with simple trims before attempting complex styles.

Final Thoughts

Mastering simple hair cutting at home is totally doable with the right approach and mindset. Start small, be patient with yourself, and remember that hair grows. These beginner hair cutting methods will serve you well as you build confidence and develop your skills. The key is practice and understanding your hair's unique needs. Every snip teaches you something new about your hair's behaviour and your own preferences. Soon enough, those quick touch-ups and maintenance trims will feel like second nature. Whether you're maintaining a favourite style or trying something completely new, the freedom of DIY hair trimming is genuinely liberating. Your hair, your rules—and with these techniques in your back pocket, you're ready to make it happen.
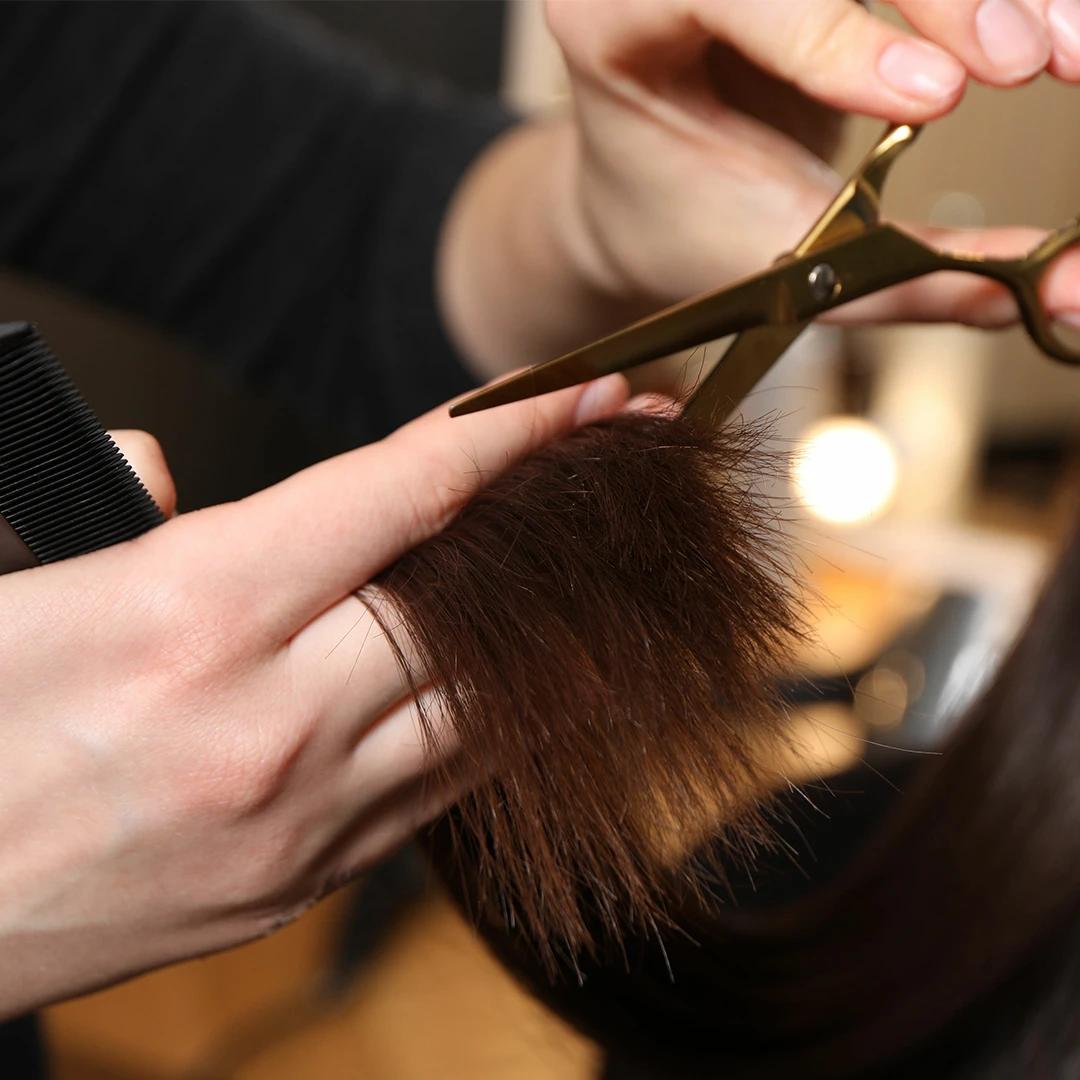
Sangria Experience Logo
Document