How to Contour Face: Beginner's Makeup Guide
 52 gm
52 gmAce of Base High Coverage Contour, Corrector & Concealer Palette
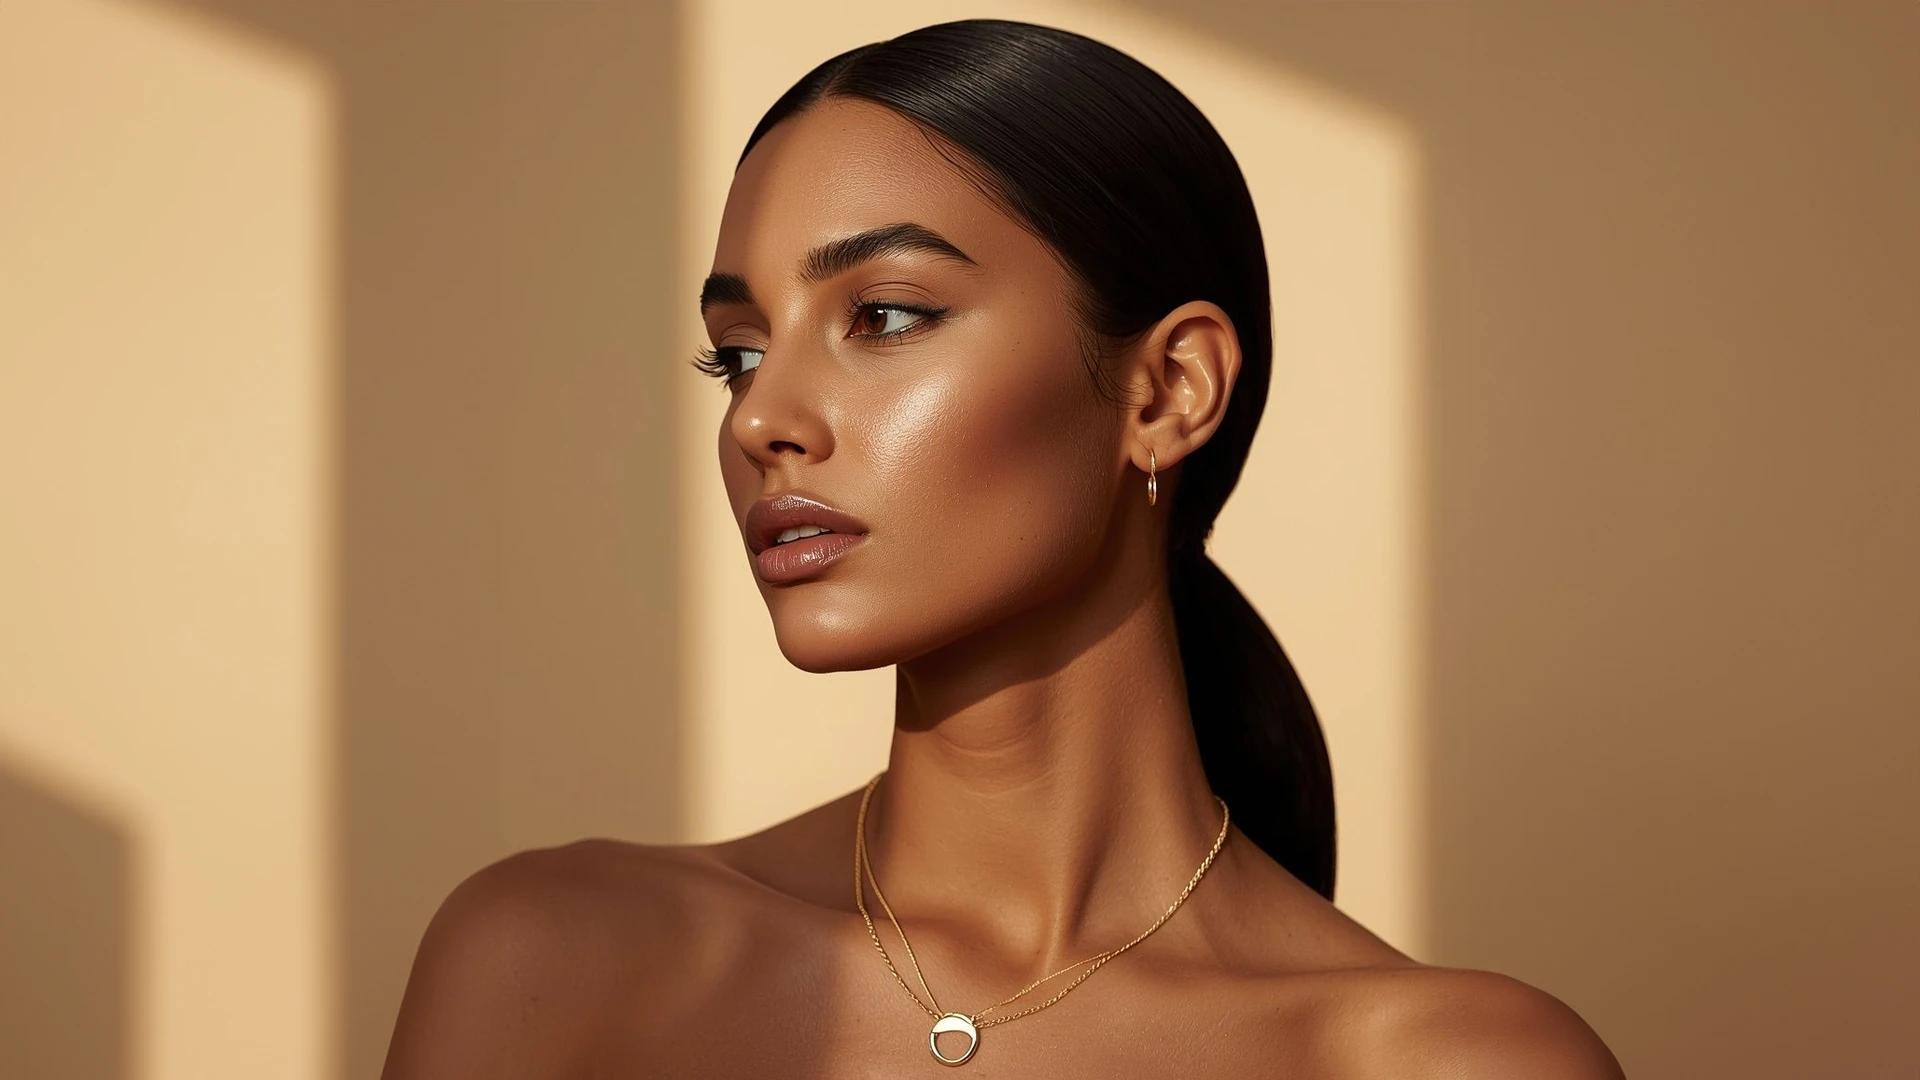
Let's be real—scrolling through Instagram and seeing those perfectly sculpted cheekbones can make anyone wonder how to contour face like a pro. But here's the thing: contouring isn't some mystical art reserved for makeup artists. It's actually a pretty straightforward technique that uses shadows and light to enhance your natural bone structure. Think of it as your face's personal photo filter, but in real life. Whether you're after subtle definition for everyday wear or want to master that chiselled look for special occasions, learning face contouring is totally worth the effort. The best part? You don't need a makeup degree to get started—just the right products, tools, and a bit of practice.
Face contouring is essentially the art of using darker shades to create shadows and lighter shades to bring forward certain areas of your face. Unlike bronzing, which adds warmth and a sun-kissed glow all over, contour makeup is strategic—it's about sculpting specific areas to enhance your bone structure.
For contouring for beginners, think of it as makeup's answer to good lighting. You know how certain angles make your cheekbones pop in photos? Contouring recreates that effect by mimicking where shadows would naturally fall on your face. It can make your nose appear slimmer, your jawline sharper, and your cheekbones more defined.
The beauty of learning proper contouring techniques is that it's completely customisable. You're not trying to change your face—you're just highlighting what's already there. Plus, once you get the hang of it, it becomes second nature, like applying mascara or lip balm.
Here's where it gets interesting—contouring works because of how our eyes perceive light and shadow. Areas that catch light appear to come forward, while shadowed areas recede. Your face naturally has high points (like your cheekbones, nose bridge, and forehead centre) and hollow areas (like under your cheekbones and along your jawline).
When choosing products, cool-toned shades work best for creating realistic shadows, while warm tones are better for bronzing. This is why using bronzer for contouring often looks muddy—it's the wrong undertone for creating convincing shadows.
Right, let's talk about the best contour products for beginners. The good news? You don't need to break the bank to get started. The key is choosing products that work well with your skill level and skin type.
Cream contour is brilliant for beginners because it blends seamlessly into the skin and gives you more working time. Powder contour, on the other hand, offers more precision and is easier to build up gradually. Many pros actually use both—cream as a base and powder to set and intensify.
For tools, a good contour brush is non-negotiable. Look for something dense but not too stiff—you want control without harsh lines. A fluffy blending brush is equally important for seamless transitions. Beauty sponges work brilliantly for cream products too.
Timing matters when it comes to how to apply contour. Cream contour goes on after your foundation but before powder products. If you're using powder contour, apply it after you've set your foundation with powder.
Always set cream contour with a light dusting of translucent powder to prevent it from moving around throughout the day. This step is crucial for longevity, especially if you have oily skin.
Ready to learn how to contour face properly? This contouring guide breaks it down into manageable steps that won't overwhelm you. Remember, practice makes perfect, so don't expect to nail it on your first try.
Step 1: Prep and Gather
Start with clean, moisturised skin and your usual base makeup. Have your contour product, brushes, and a mirror with good lighting ready. Natural light is ideal, but a well-lit vanity works too.
Step 2: Map Your Face
Look straight into the mirror and identify where shadows naturally fall. Suck in your cheeks slightly to see the hollow area—that's where your contour goes. Notice the area just below your jawline and along your hairline too.
 14 gm
14 gmSculpt Lift Contour Palette
Step 3: Cheekbones and Temples
Using your contour brush, apply product in the hollow of your cheeks, blending upwards towards your ears. Add a bit to your temples to create that lifted effect. Think of drawing a soft '3' shape on each side of your face.
Step 4: Jawline and Hairline
Lightly contour along your jawline to define it, and add a touch along your hairline to reduce the appearance of a large forehead. Keep it subtle—you can always build up.
Step 5: Nose (Optional)
For beginners, nose contouring can wait until you're more confident. If you want to try it, use a small brush to apply contour along the sides of your nose, avoiding the tip.
Step 6: Blend Thoroughly
This is where the magic happens. Use circular motions and light pressure to blend all harsh lines. Take your time—good blending is what separates amateur from professional-looking contour.
Step 7: Add Highlighter
Apply highlighter to the high points of your face—cheekbones, nose bridge, forehead centre, and chin. This creates the contrast that makes contouring effective.
The secret to natural-looking contour is all in the blending. Use a dense brush for initial application, then switch to a fluffier brush for blending. Work in small circular motions, gradually diffusing the edges.
If you notice any harsh lines, don't add more product—instead, use a clean, damp beauty sponge to gently bounce over the area. This softens everything beautifully without removing the contour completely.
Here's where sculpting face gets personalised. Your face shape determines where you should focus your contouring efforts. The goal isn't to change your face shape but to enhance your natural features and create balance.
Understanding your face shape helps you make strategic decisions about where to add shadows and highlights. It's like having a personalised roadmap for your contour makeup routine.
Round faces benefit from contouring that creates length and definition. Focus on the sides of your forehead, under your cheekbones, and along your jawline. Avoid contouring the chin area, as this can make your face appear shorter.
Oval faces are naturally balanced, so you can follow the standard contouring technique. Focus on enhancing your existing bone structure rather than trying to change proportions.
Square faces look great with softened angles. Contour the corners of your forehead and jawline to create a more rounded appearance. Add extra blending to avoid harsh lines.
Heart-shaped faces should focus on balancing a wider forehead with a narrower chin. Contour the sides of your forehead and add a touch to your chin to create width.
Long faces benefit from horizontal contouring. Focus on your hairline and under your chin to create the illusion of width and reduce length.
If your goal is a slimming effect, focus on the perimeter of your face. Contour along your hairline, under your cheekbones, and along your jawline. The key is creating a shadow that visually narrows your face.
Avoid over-contouring, which can actually make your face look wider. Instead, use a light hand and build up gradually. Remember, the goal is subtle definition, not dramatic transformation.
 1N
1NPRO Angular Contour Brush
Let's talk about the mistakes that can turn your contouring techniques from fabulous to frightening. The good news? These are all totally fixable with a bit of know-how.
The biggest mistake beginners make is using bronzer instead of proper contour products. Bronzer is warm-toned and meant to mimic a tan, while contour should be cool-toned to mimic natural shadows. Using bronzer for contouring often results in that muddy, orange look we've all seen.
Another common issue is applying too much product at once. Contour makeup should be built up gradually—it's much easier to add more than to remove excess. Start with a tiny amount and build up slowly.
Skipping the blending step is a recipe for disaster. Harsh lines are the telltale sign of amateur contouring. Always, always blend thoroughly. If you're short on time, it's better to skip contouring altogether than to leave harsh lines.
Wrong brush selection can also sabotage your efforts. Using a brush that's too big makes precision impossible, while one that's too small makes blending difficult. Invest in the right tools—your contour will thank you.
If your contour looks muddy, you've probably used too much product or the wrong shade. Use a clean, damp beauty sponge to gently lift some of the product. If it's still too intense, apply a light layer of your foundation over the top and re-blend.
For harsh lines, use a fluffy brush with no product to blend the edges. Work in circular motions, gradually diffusing the line until it looks natural. Sometimes a clean beauty sponge can work wonders too.
Once you've mastered basic face contouring, you can start experimenting with different techniques and finishes. Cream contouring gives you that dewy, natural look that's perfect for everyday wear. It melts into the skin beautifully and looks incredibly natural in person.
Powder contouring offers more structure and precision. It's brilliant for photography and special occasions when you want more dramatic definition. Many makeup artists use both techniques together for the ultimate sculpted look.
For everyday wear, try a subtle approach—just a whisper of contour under your cheekbones and along your jawline. This gives you definition without looking overdone. Save the full-face sculpting for evenings or special events.
Building confidence with contouring for beginners is all about practice. Try different techniques when you're not going anywhere—this takes the pressure off and lets you experiment freely. Take photos in different lighting to see how your contour translates.
Adjust your contouring based on the occasion and lighting. Natural daylight is forgiving, so you can go lighter. Indoor lighting often washes out contour, so you might need to intensify it slightly.
For photos, especially with flash, your contour needs to be a bit more pronounced to show up. Practice your photography-friendly technique beforehand so you're not guessing on the day.
Smytten's curated selection of makeup products makes it easy to experiment with different contour palettes and techniques without committing to full-size products. With trial packs from trusted brands, you can discover your perfect contour shade and formula before investing in the full-size version.
 1 Piece
Stay Sharp Contour Brush
Cream contour goes after foundation but before powder. Powder contour goes after you've set your foundation with powder. This ensures everything blends seamlessly and stays put all day.
The key rules are: choose cool-toned products, blend thoroughly, build up gradually, use the right tools, consider your face shape, practice good lighting, and always set your work. Following these ensures natural-looking results every time.
Your contour shade should be 1-2 shades darker than your natural skin tone with cool undertones. Test it on your jawline in natural light—it should look like a natural shadow, not muddy or orange.
While you can in a pinch, bronzer isn't ideal for contouring because it's warm-toned. Proper contour products are cool-toned to mimic natural shadows. Using bronzer often results in a muddy, unnatural look.
For beginners, allow 10-15 minutes for a full contour routine. As you get more practiced, you can achieve a subtle everyday contour in about 5 minutes. Remember, it's better to take your time and blend properly than rush and end up with harsh lines.
Contouring uses darker shades to create shadows and recede areas, while highlighting uses lighter shades to bring areas forward and catch light. They work together to create dimension and definition on your face.
If you can clearly see where your contour starts and ends, or if it looks muddy or unnatural, you've probably overdone it. Natural contour should enhance your features subtly, not completely change your face shape.
Yes, you can contour without highlighter, but the two work best together. Highlighter creates the contrast that makes contouring effective. If you skip highlighter, make sure your contour is very well blended to avoid looking flat.
Learning how to contour face properly is like mastering any skill—it takes practice, patience, and the right tools. Start with subtle, everyday looks and gradually work your way up to more dramatic techniques. Remember, the goal is to enhance your natural beauty, not mask it.
The beauty of contouring lies in its versatility. Whether you want barely-there definition for work or full glamour for a night out, these techniques adapt to your needs. Don't be discouraged if your first attempts don't look Instagram-ready—even professional makeup artists had to start somewhere.
With Smytten's extensive range of makeup trial packs, you can explore different contour palettes and formulas without the commitment of full-size purchases. From cream contours to powder palettes, discover what works best for your skin type and skill level. After all, why settle for guessing when you can try it all and find your perfect contour match?
